
 I had long given up on the whole idea of baking or creating anything cake-related in my kitchen when I stumbled upon a whole new world of sweets about 5 years ago. For someone like me, not all that fond of sugary, sticky, carby, calory dense, cake-related treats, the discovery of the no-bake cheesecake was the light at the end of the tunnel. Channeling my obsession with fresh fruit and berries into experimenting around with these cakes to come up with new combinations and make them as delicious, healthy and low-cal as possible still keeps me rotating around my kitchen from time to time.
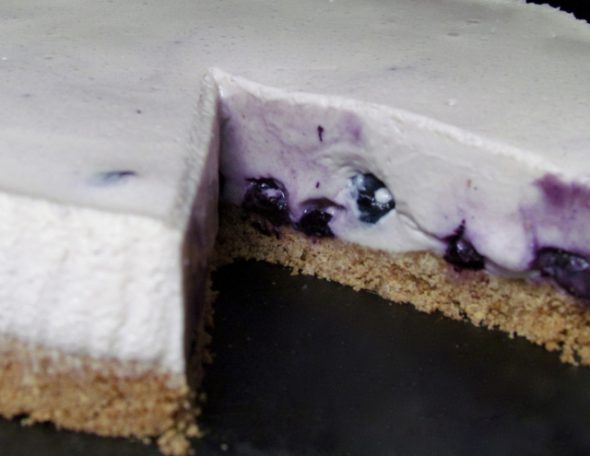
This one was one of my first 12-round trial-and-error fights with the usual suspects, white chocolate and blueberries. The thing, or more accurately thingS, that made getting this one right so hard were the star players in this game, the blueberries. Most of the no-bakes I could find back then had a cake or cookie base, a cream cheese layer and the fruit or berries as a seperate layer on top. Not being too familiar with the workings of cream and gelatine, I didn’t see the reason for the extra fruit layer and stubbornly chased after the idea of making the berries work inside the cream cheese layer. At some point I realized this caused the filling to disintegrate, but … I just had to make it work! And I did in the end… I had to ditch the 0,3% cream cheese for the 20% version and use more gelatine than I usually do for no-bakes (actually most of them don’t need any gelatine at all), but I sure as hell had a Rocky’esque Eye of the Tiger moment when I took the cake ring off of the last in a long line of experiments and it finally held together. Why not ditch the experiment and pick something else or go with the three-layer setup after a couple of failures? Because the filling, even while it wasn’t holding it’s shape, tasted soooo good! Oh on that note… did you know lightly banging your head against a wall for 30 mins burns about 150 calories…?
120g Whole Grain Butter Cookies, finely ground into cookie sand
60g Butter, melted and slightly cooled
80g White Chocolate, roughly chopped
3 Gelatine Leaves
250g Cream Cheese , at room temperature
180g Condensed Milk
150g Cream, whipped to soft peaks
50g Unrefined Caster Sugar
½ Lemon, Zest (Summer)
½ Vanilla Pod, Seeds (Winter)
100g fresh Blueberries
75g frozen Blueberries
1) Place the cookies in a pestle and mortar and grind them into fine crumbles. Alternatively you could pop them into a zip-lock baggie and have at it with a rolling pin – this can be oddly satisfying…
2) Move the crumbles into a mixing bowl and combine them with the melted butter.
3) Stir the lot with a wooden spoon until your pile of crumbles has taken on a sort of wet-sand consistency.
4) Line a 16-18cm DIA springform with baking parchment – if you have a cake ring, lock it at 16 or 17cm DIA and set it onto a lined tray. I personally go with a cake ring locked at 16cm DIA and a parchment wrapped cutting board since there’s no other way to fit the cake into my fridge.
5) Tip the contents of the bowl into your springform. Use whatever means necessary to press the crumbs into a firm and even layer on the base of your form. With springforms that size you should be fine with using the back of a spoon. The cake ring I’ve been using, however, has a really high rim, so set at a small DIA as this I could only use the spoon to even out the edges. I used my pestle to tap-tap my way from the inside to the rims where I switched to the spoon to even everything out. A friend of mine re-purposed some sort of meat-press thingemabob for this kind of task. Whatever you use, make sure you’ve spread out and compressed the „dough“ as evenly as possible. Pay some extra attention around the rims, loose bits there might allow the filling to seep through.
6) Once you’re done with the base, set it into the fridge to set for 30 mins.
7) Meanwhile, place the chopped chocolate in a waterbath – a bowl set onto a pot of lightly simmering water – to gently melt it. As usual, make sure the bowl doesn’t touch the water, in order to keep it from overheating.
8) Gently stir the chocolate from time to time until it’s completely dissolved and silky smooth.
9) Set the bowl aside and let it cool down to room temperature.
10) Soak the gelatine leaves in cold water for 5 mins.
11) Pour the condensed milk into a small pot set on low heat, add the sugar and stir until it’s completely dissolved.
12) Squeeze any and all excess water out of the gelatine leaves and add them to the warm, milky mixture. Stir the liquid until the leaves have dissolved completely. To make sure no wobbly bits of gelatine are still on the loose, strain the liquid to a fine sieve into another bowl.
13) Set the mixture aside for around 5 mins to let it cool down a little.
14) Place the cream cheese and the lemon zest or vanilla seeds – depending on your pick – in a large mixing bowl and add the condensed milk mixture. You could use both together, by the way, but in my experience the combination of the two can overpower the berries.
15) Whizz everything with a handheld until the mixture is creamy and smooth.
16) Set your handheld to a low speed and add the chocolate in a slow and steady stream while working it into the mix. Keep at it until the chocolate is well incorporated into the creamy mix.
17) Whisk the cream until it’s stiff enough to form soft peaks, then gently fold into the chocolate mixture.
18) Fold in the fresh blueberries and get your base ready. Make sure not to squish the berries.
19) Just before topping the base with the creamy filling, fold in the frozen berries – fresh out of the freezer. This will have two effects on your filling. First off, if you don’t go ahead and stir them around a lot, they will give off some juice at contact with the warmer liquid and create pretty purple trails in your filling. Secondly, they will help the filling cool down and set more quickly, which was the reason why I’ve initially dumped a bunch of frozen berries into a bowl of a filling that seemed waaay to thin to set at some point.
20) Pour the filling onto the biscuit base in your springform or cake ring.
21) Place it in the fridge to chill and set for 6-8 hours or, even better, overnight.
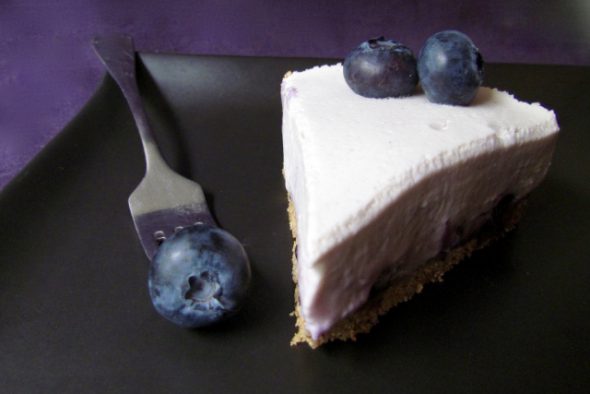
Just on a side note – this goes for all no-bake-cheesecakes I’ve encountered so far – the filling for this type of cake is creamy and fluffy, so you can’t stack it up as high as you could with a denser filling without risking it to fall apart as soon as you cut it. A safe bet would be going with a 1/3 or 1/4 base – 2/3 or 3/4 filling combination. Have an eye on the levels in your sprinform, just in case your blueberries are huge or the cream did weird things, don’t pour in all of the filling if you feel it could get too top-heavy and capsize in the end.
And keep in mind that the thickness of the base kind of limits the range (in centimeters) in which you can interpret the one-third-of-the-lot rule of thumb. Past a certain point it just becomes inedible without a jackhammer.
This one hasn’t failed me since I arrived at this final version, so I really hope you guys don’t run into any problems with it either. Just in case the berries you used gave up too much juice and you catch the mixture not setting… do what we did – scoop the cream into bowls, stick a few cookies in it and have a spoonful! I always forgot all about being annoyed at the silly cakes not setting after the first spoon.
Enjoy~
♥
