
 September, golden September~! While the sun is taking a very well deserved break right now, the month is still a golden one for me, my kitchen and our dinner plates. Wine harvest time, grapes and all the goodies that always tag along in their wake, forests brimming over with game, the first pheasants, mushrooms, and, amongst many other delicious seasonal things, enter the first representatives of the only “Golden Globes” I care about – quinces~!
This time around, I’ve prepared a merry trio (and a half) of recipes for you guys, each of them using the previous one’s leftovers in the most delicious way possible. The culprit setting off this annual delicious chain of food-events is a tweaked version of my grandma’s Quince Jelly which will be followed by the perfect way to use up the fruit pulp left behind by the jelly-making process – in the end you’ll be throwing out nothing more than the gnarly cores and seeds of the quinces. The result of that one has two possible outcomes, one sweet and one savory. I’ll be covering the sweet one today, the savory one next week, so make sure to pop a sufficient amout of it into the freezer for safekeeping – even the most peckish Hubby doesn’t like to bite into the most desireable treat when it’s frozen solid! Tee~hee~!
A quick, tool-related hint in advance: once you’re through with Part #1 of the deal, the Quince Jelly, you’ll be rewarded with about 800ml of piping hot proto-jelly, so make sure you have an appropriate amount/size of jam jars and a jam funnel or jug thoroughly sterilized and at the ready before closing in on the finishing line.

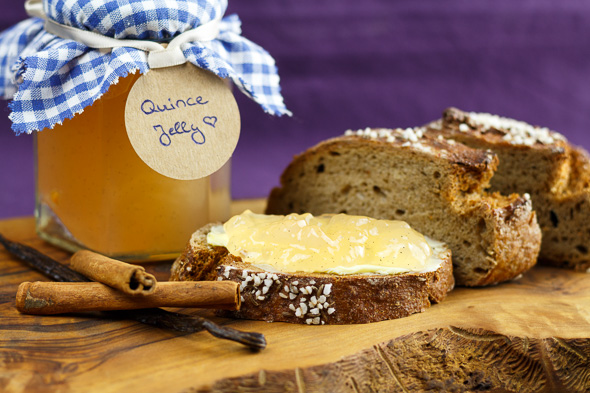
The Quince Jelly
1,5kg Quinces
10 Tbsp fresh Lemon Juice
3 Oranges
1 Pinch of Salt
300g Gelling Sugar 3:1 (Fruit : Sugar)
½ Vanilla Pod
Here’s a little warning ahead: you’ll need a clean kitchen cloth for this one but, like I had to find out the hard way, you’ll ruin it’s visual appearance in the process. I simply gave up trying to remove the stains my first quince jelly left behind on a shiny new, white kitchen cloth when the next quince season came knocking at the door – I’ve been using the same cloth – thoroughly washed after each round, of course – ever since. A strong-weave cheese cloth works too, but muslin sheets are too delicate for this task.
1) Pick a very large bowl or pot and pour in 2l of cold water.
2) Add the lemon juice and give the liquids a stir to combine them.
3) You won’t be skinning the quinces for this recipe, so pick up a clean towel and treat the fruit with a thorough rub-and-scrub to remove the white fuzz covering their surface.
I remember my grandmother banging and clanging around her kitchen, swinging her heavy cleaver at the quinces with as much tool-related noise, unintelligible grumblings and steam whistling out of her ears as possible to make sure everyone knew how much she hated quinces, jellies, the world and everyone who liked either one of those three… Well. She loved us, but I have to admit, quinces are quite the tough candidates for precise knifework, even for those of us going through the motions of chopping up quinces before we hit the 80 year-mark. One of the “tweaks” I mentioned is a shortcut that eliminates the need for a flying cleaver and terrified husbands and grandchildren that will scramble to first dodge, then pick up the cleaver and finish up the work for you.
4) So, instead of peeling and coring the quinces like an apple (with a cleaver… what was she thinking?), simply twist off the stem and, with the tip of a very sharp knife, remove the knobbly and unsavory remains of the blossom at the bottom of the bruit.
5) Use a heavy, very sharp knife to first slice the quinces in halves, then into ~2x2cm pieces.
6) Immediately dump the chunks into the lemon-water – in case you’ve never worked with quinces before and think avocados brown fast once exposed to fresh air, you’ll get to know a whole new level of “fast” today… They’ll be even quicker to sour your mood if they’re still a bit unripe – in that case, dip the bigger pieces you’re working on into the lemon water in between the swipes of your knife to stay on the safe side.
7) Once you’re done with the whole batch, transfer the quince dice into a large pot and add 600ml of the lemon water.
8) Turn the heat up high and bring the lot up to a rapid boil, then turn the heat back down to low.
9) Once the bubbling action has settled down again, cover the pot with a lid and allow the golden goodness to simmer away for roundabout 30-40 mins until the pieces are tender and the steam poofing out of the pot is fragrant and deliciously quincey enough to give you a serious case of wobbly knees.
10) Congratulations, here’s the ominous “and a half…”-result~! You’ve just made a little less than a liter of yumtastic homemade quince juice, without any additions of sugar, gelatine or other stuff you might find in the bottled juice. Tempting as it might be to simply allow it to cool off and drink it, unless you planned ahead for this outcome and doubled your amounts from the start, you’ll be turning the juice into jelly now.
11) Pop a colander onto a second, slightly smaller pot – a 1 ½ – 2l pot should suffice – and line it with the clean towel/cloth I mentioned earlier.
12) Carefully pour the contents of your juice pot into the colander and, once everything’s safely trapped inside, allow the juice to pass through the cloth at it’s own pace for about 20 mins.
13) Once the time’s up, gather up the sides of the cloth hanging over the rim of the colander, make sure all of the quince bits are tucked in, then fold the edges of the cloth on top of the pile and give the newly forming blob inside a hearty twist to swueeze out the remaining juice inside.
14) Keep twisting the cloth tighter and tighter while catching the juices with the pot below your colander. Make sure no fruit pulp makes its way through the cloth into the pot during the process. 14) Once you can’t squeeze out any more juice without the help of some sort of power tool, set the cloth-wrapped pulp into a bowl and out of your way for the time being – that’s Part #2 of today’s Quince Deal~!
15) Transfer the liquid results of your efforts into a measuring cup for the time being but keep the pot nearby.
16) Juice the oranges and pass them though a sieve lined with a sheet of muslin to keep fruity bits and seeds out of the jelly – unless you don’t care if it’s not a 100% clear jelly in the end.
17) Add enough orange juice to the measuring cup holding your quince juice until the fruity levels inside reach 900ml.
18) Pour the juice mixture back into the waiting pot and set the heat to medium-low.
Now, I remember my grandma kept using copious amounts of regular refined sugar and an infuriatingly inaccurate “a bit” of apple pectin and simply stood there for hours, wooden spoon in hand, stirring the pot and looking for signs only she could see to tell her the jelly – any jelly or jam, for that matter – was done. Since I never had the chance to ask her what exactly she was looking for, I had to resort to storebought jam/jelly sugar and the instructions on the back of the package. When it came down to picking one of the many different varieties of gelling sugars, I thought back to my grandmother’s and her sister’s jams and jellies and remembered that I always liked my aunt’s jams better since they weren’t as sweet and way more fruity than my grandma’s. With that memory in mind back when I went through my quince-jelly-baby-steps, I set off to a nearby organic food store (to steer clear of the artificial sugar-replacements and sweeteners) and picked the jam sugar with the lowest sugar ratio, a 3:1 (Fruit:Sugar) Gelling Sugar number specifically developed for clear Fruit Jellies and, as was to be expected, it turned out perfectly – I’ve been using the same brand ever since.
19) Long story short, pick up a wooden spoon and stir the juices while you slowly but steadily sprinkle in the sugar.
20) Once the sugar’s in and well on its way to dissolve, pop on the vanilla seeds.
21) Keep stirring until the sugar has dissolved completely and the vanilla dots are unclumped and evenly distributed throughout the juice.
22) Turn the heat to high and bring the mixture up to a rapid bubble again – this time, keep it there for 5 mins and keep stirring it gently the whole time.
23) Turn off the stove and place your sterilized jars on a wooden cutting board.
24) Immediately pour the steaming hot jelly into the jars – with utmost care or the help of an – also sterilized – jug or jam funnel.
25) As soon as the jars are filled to the rims, twist them shut and flip them over to stand on their lids for the first 5 mins of the cooling process.
And that’s it, about 12 hours later, you’ll be able to crack open a jar and, if everything went according to plan, enjoy a delicious spoonful of quince to the square. But in the meantime, there’s some leftover management to be done and (potentially) chocolatey treats to be made~
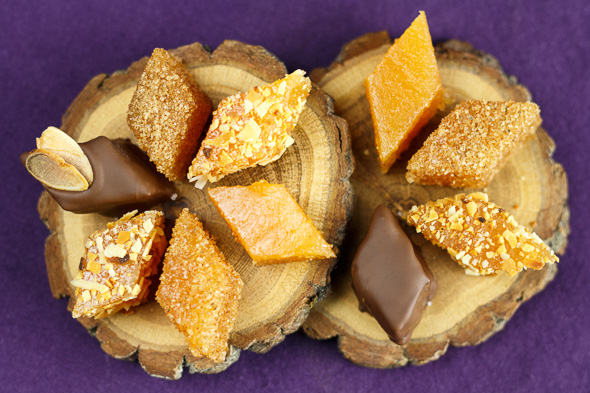
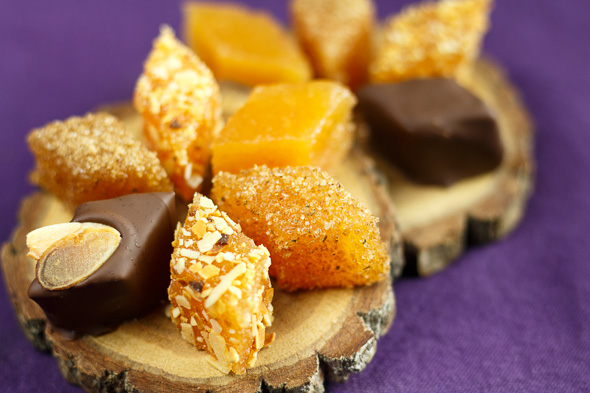
The “Quince Bread”
Assuming you used the recipe for the jelly above, you’ll end up with roundabout 750-800g of somewhat mushy but still fragrant and delicious quince bits once you’ve removed the cores and the odd seed that will have made a run for it in the heat of things.
The Quinces, cores and seeds fished out
Exactly the same amount of sugar
1 Pinch of Salt
1 Pinch of Cinnamon
Opt: A Pinch of Gingerbread Spice
Opt: 70% Dark Chocolate because they’re very very sweet
Alt 1: Roasted Almonds, finely crushed
Alt 2: Sugar & Cinnamon
Alt 3: Nothing else at all – I’ll get to that in a bit~
1) Transfer the contents of the kitchen cloth you’ve used earlier into a bowl and re-check the pile of quince bits for stray gnarly bits of the cores.
2) Pull out your kitchen scale and measure their weight.
3) Pick a second bowl and measure off the exact same weight in fine baking sugar.
4) Pop the quince bits into a blender and whizz the lot into a very fine purée.
5) Place both the quince purée and the sugar in a large pot and set the heat to low.
6) As the mixture is heating up, pick up a wooden spoon and slowly stir the lot until the sugar has dissolved.
7) Turn the heat up to medium heat, step by step, until ominous plops will tell you that, if this were something more runny, it would be simmering.
8) Grab a book, an audiobook or something of that sort to keep you from dozing off over the pot – or find something else to do in the kitchen for an hour – and keep stirring the mixture every other minute to keep it from sticking to the pot. Believe me, it loves to do that and for some reason, seconds do count. The stuff must be related to pine nuts somehow…
9) 1 hour later, your quince purée should have turned into a thick golden paste. Of all the things one could possibly compare the visual to… warm, creamy Peanutbutter was the first thing that popped into my mind. A fruity and not-that-fudgey version of it, anyways. It should be a smooth, homogenous, creamy paste, not leaving behind streaks of juice at the bottom of the pot anymore as you stir.
10) Line a brownie tin, cake tray or any other shallow’ish container of roundabout 25-30×30 cm with a sheet of baking parchment. The paste should end up inside in a 1-1 ½ cm-thick layer.
11) Pour the thick quince paste into the tin and smooth out the surface once it’s evenly spread out in the tin – keep the max of 1 ½ cm thickness in mind, the bread wouldn’t set properly if it would be stacked up a lot higher than that.
12) Tap the tin onto your work surface a couple of times to pop out any air pockets trapped inside while you’re at it.
13) Once you’re satisfied with the visual, place the tin or tray in a safe spot in a warm and dry room for 2-3 days to allow the quince mixture to set and dry in peace. A gentle prod with your thumb will tell you if it’s done or if the mix needs more time to set – non-gooey, firm but slightly springy is what you’re looking for.
14) If you’re in a hurry or simply hungry for the treats, set your oven to 90-100°C and pop in the tin/tray – but leave the oven door open! – for ~4 hours. I suppose one of those fruit dessicator whatchamacallits will do the trick too, but I have no idea how to operate one of those…
15) When the time’s ready, pick up a sharp knife, turn the brick of quince bread out on a cutting board, remove the parchment and slice it into evenly-bite-sized squares or rectangles. In case the mix is still a bit sticky, keep a wet towel nearby to clean the blade in between swipes and let the newly qut pieces sit on the board for a couple of hours to allow the cutting surfaces to dry off before further handling them.
16) To finish up the treats, you could coat them with liquefied dark chocolate, dust them with a Cinnamon & Sugar blend or roasted almond bits… or simply leave them “naked” as they are – give a naked one a test-bite and decide on which way to go depending on how their sweetness works for you. If it’s a bit too much, go with the bitter note of the chocolate. Almonds also take a bite out of the sweet edge while the Sugar and Cinnamon deal actually underlines it more than it adds to it.
17) If you’re happy with them as they are, you’re done right away. Hubby’s recommendation: Naked → Almond → Sugar & Cinnamon → Chocolate. That order coming from a happy sweet-tooth and part-time chocoholic (only when there’s chocolate to be found anywhere in the house) says a lot, I think~ My favorites, of course, are the naked ones as well, but if I had to pick a topping, the almond coat would be my pick since the nuts add that special “something” really dotting the I on the bites.
18) Once the cutting surfaces are dry or, alternatively, your toppings/coats have set, transfer the bites into an airtight container, evenly spaced and the layers separated by parchment paper to keep them from sticking to eachother.
19) In theory, thanks to the somewhat scary amounts of sugar on top of scary amounts of fruit sugar, possibly coated in sugar and a hint of cinnamon, these delicious bites will keep for about a month. That theory hasn’t been tested yet, though… I know a lot of sweeth (saber…?-)toothed people and quince fans~
The proto-bites, or to be more precise: the uncut/uncoated block or larger slices of the quince bread freeze exceptionally well. In case you want to keep a stash of the base as a sweet ace up your sleeve, wrap the pieces you want to hide in parchment paper and a zip baggie to protect it from freezebite.
In case you’re about to follow my advice to freeze a bit of the quince bread in prep for next weeks’ savory take on the whole quince bread matter, aim for a disk or square of roundabout 5-8cm DIA if you go the dessert-ring-gone-cookie-cutter way or 6-7cm side-length if squares are your way to go – one per person and one for safety~
Until then, lean back, grab a freshly baked scone, a bit of butter and a jar of your jelly and…
…Enjoy~!
♥

Wonderful, detailed post. I love quince and use them often. I usually don’t add any flavorings to my quince squares, but love the ones you’ve used. Will keep it in mind for my next batch! 🙂
LikeLiked by 1 person
Glad to hear that~! I hope you enjoy them as much as we do 😀
LikeLiked by 1 person
Absolutely. It’s one of my favorite snacks. I make a big batch every year. 🙂
LikeLike
Great recipe ! I wish I could try & make it as beautiful as you’ve made.
LikeLiked by 1 person
Thanks a lot~! Just give it a try, it’s a lot easier than the length of the recipe might suggest 🙂 And in the case of the fruit bites… a bit of patience and, if you’re doing this for the first time, a wooden/kitchen-safe ruler and a sharp knife are all you need~
LikeLiked by 1 person
Thanks for the tips. I’m ready for this adventure. 🙂
LikeLiked by 1 person
It fascinates me how many ways there are to prep quinces. If I’m going straight to the membrillo/quince paste/quince cake (you need a quince tree to be this profligate with the fruit) I often bake them whole, a tip from a 16th century cookbook. It makes them much easier to peel and core. Otherwise I follow a similar route to you. I’m interested by your additional of the orange juice at the jelly stage and your various toppings. I probably dry my paste for longer than you as mine keeps happily (in a sealed container in the fridge to be on the safe side) for a year or more. Lx
LikeLiked by 1 person
Yep~ I just looooove how versatile they are and, even after years of hiding quinces in various dishes, I can still surprise my guests – and myself, for that matter – with new combinations 😀 Baking them before working with them is a new way to prep them for me, I’ll give it a go when I can~! My neurons immediately jumped to a baked potato kind of scenario… do you think/know that would work or is the quince-obsessed part of my head completely spinning out of control right about now?
LikeLiked by 1 person
Hmm, interesting idea, don’t see why they shouldn’t work like baked apples to eat for pud. Would need to make sure they weren’t too grainy, maybe?
LikeLike