
 As Summer is returning, high temperatures and all, so is the time for easy-breezy-to-whip-up refreshments shining an appropriate spotlight on the edible stars of this season! The next three recipes I’ve prepped for you guys do, at least in my book, exactly that – highlighting mother natures masterpieces of Summer with little to no effort, leaving you with enough extra time on hand to go for a walk and enjoy the great outdoors for a while before digging in~
I’ll be posting a dinner-style trio of dishes – a salady starter, a meaty main dish and a matching dessert – in the order they’re best prepared in (assuming you’re serving them all up on one go), taking cooling/cooking times into consideration, starting with this week’s dreamy, creamy dessert.
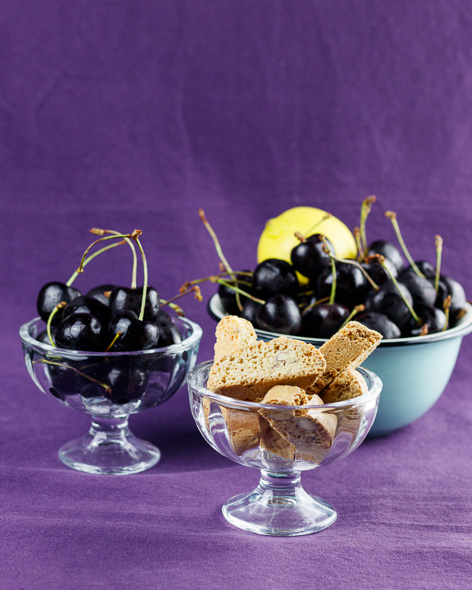
Today’s star ingredients are my favorite greens grocer’s absurdly large – more than 3cm in diameter this year! – black cherries. Normally I give any unnaturally sized foodstuffs a wide berth since those things are usually grown for show or giggles only. A humungous zucchini with the taste and texture of wet wool wrapped in cardboard I initially thought was a perfect candidate for an oven-version of my Summery Stuffed Zucchini was one of the last nails in that particular coffin… Anyways, once I got over my reluctance to taste-test them when I first discovered them a couple of years back, these cherries turned out to be the perfect example for the (very freely misquoted) saying “don’t judge the zucch… ah… cherry by its size”. Their intense aroma actually matches their size! Since they are only available for 2-3 weeks per year and have quite the impressive price tag on them, I do my very best to make them shine year after year – even more so since the bar for success is set quite high with someone who’s not automatically over the moon when it comes to cherries as my dishes’ first judge. But, I’m very pleased to announce that, right now, I am absolutely over the moon not only about this year’s cherries themselves but also about the fact that this one has received the Hubby-Stamp-of-Approval along with a cream-muffled compliment along the lines of “Mmmmpf these cherries… once you’re through with them! Mmmore?”
The Marinated Black Cherries
300g Ripe and Juicy Black Cherries – any size of black cherry works, of course! Just make sure they’re delicious enough to make saving about 400g of them (so you’ll end up with a bit more than 300g after cleaning and pitting them) for this tiramisu a challenge~!
2 Tbsp Ginja or any other Full-bodied Cherry Liqueur – if you’re only able to get your hands on a high voltage version of cherry hooch or if you’re looking for a non-boozy alternative, use organic Black Cherry Syrup instead
2 Tbsp Maple Syrup
1 Pinch of Freshly Cracked Black Pepper
1) Thoroughly rinse the cherries, then stem and pit them. I have one of those nifty cherry-pitting doohickeys that can double as a nutcracker, but of course a convenient tool like that isn’t designed to deal with Goliath cherries. Guiding a very sharp knife around the pit, halving the cherries in the process, takes quick care of that problem though, should you find yourself gizmo-less or blessed with supersized cherries.
2) Once you’ve dealt with the pits, divide your pile of cherries in two and finely chop one half of the red gems.
3) Carefully slice the other half of the pile into halves – if you haven’t done so during the pitting process already.
4) Set a couple of the halved cherries aside for decorative purposes if you’d like – or clean up a couple of extra cherries for eye-candy reasons… if you have any left, that is.
5) Pick up a mixing bowl and add the liqueur, maple syrup and pepper.
6) Whisk the lot until the maple syrup is well incorporated.
7) Transfer the cherries into the bowl and gently fold them in on themselves until they’re all evenly glossed over with the slightly sticky liquids.
8) Seal the bowl with a sheet of clingfilm and place it in the fridge or in a cool spot of your kitchen for about 1 hour, giving the cherries a bit of time to soak up the all of the added yumness.
The Limoncello-Mascarpone Cream
3 Large, fresh and preferably “Happy” Eggs
75g Fine Caster Sugar
200g Mascarpone – to be honest… of course I’ve tried using low-fat mascarpone. Several times, several different brands, the works. But in the end, while the low-fat stuff is a fantastic option to save some calories on pasta fillings and the likes, the signature taste of a Tiramisu simply needs the real deal. Lightening it (and/or my conscience) up with the yoghurt is the best option I’ve found so far.
100g Low Fat Yoghurt
200g Low Fat Cream
60ml Limoncello
Non-boozy Alternative: High Quality Lemon Syrup
1 Unwaxed Lemon, Zest
3-4 Drops of Lemon Extract
2 Gelatine Leaves
1) Place the eggs and sugar in a large mixing bowl.
2) Pick up your handheld, set the speed of the beaters to high and whisk the lot until turns into a pale yellow, thick and creamy cloud.
3) Grab a second mixing bowl and add the mascarpone, yoghurt, cream, lemon zest, extract and limoncello.
4) Whisk this batch of ingredients into a invitingly soft and creamy fluff as well.
5) Keep going until your whisks leave behind soft peaks standing at attention when you pull them out of the bowl for a closer look-see.
6) Rinse the beaters and, while you’re at it, fill a shallow bowl with enough cold water to soak your gelatine leaves – and add said leaves before setting the bowl out of harms way.
7) Pick up a rubber spatula and gently fold the mascarpone fluff into the egg fluff.
8) The best strategy to preserve as much of the pillowy cloudyness as possible is by working the mixtures together in three steps, each time slowly and gently folding the components in on each other until they are perfectly incorporated before adding the next round. You can’t rush a delicious Tiramisu~!
9) Once you’re done, spoon 5 tbsp of the mixture into a small pot set onto medium heat.
10) Warm up the mixture just enough to make it melt into a liquid state again and take care not to let the heat get too (bubbly) high.
11) Squeeze any excess water out of the gelatine and add them to the pot to melt into the cream.
12) Whisk the resulting liquid until the gelatine has dissolved completely.
13) Take the pot off the heat once the leaves have melted and allow the mix to cool down to just above room temperature (at which it would start to set, so don’t leave it our of your sight~)
14) Fold the gelatined cream into the “main force”, making extra sure the new addition is very well incorporated throughout the Tiramisu fluff.
15) Wrap up the bowl and place it in the fridge for a short time, just to keep it cool while prepping the cookie base.
The Cantuccini Cookie Base
200g Cantuccini
100ml Ginja – my pick for this one of course – alternatively any other kind of Cherry Liqueur, Amaretto or even Kahlua will do nicely.
Non-boozy Alternative: High Quality Black Cherry Syrup or Amarena Cherry Syrup – the stuff they’re preserved in. Lighten it up with a bit of Cherry Juice
100ml Espresso or spoonmeltingly strong coffee
1 Pinch of Salt
1) Whisk the liquids and the salt together in a small bowl or jug until they’re well combined.
2) Spread out the cookies in a shallow dish and brush them with about half of the boozy coffee.
3) Allow the liquids to “sink in” for a minute or two, then turn the cookies over and repeat the process with the other side.
4) Have an eye on the bottom of your cookie-carrying dish at this point – any signs of liquids running through and pooling beneath the cantuccini are your cue to hold back on the rest of the liquids to avert an unpleasantly soggy outcome.
Assembling the Tiramisu
The Cantuccini Base
The Marinated Black Cherries
The Limoncello-Mascarpone Cream
200g Dark Chocolate, at least 70% Cocoa solids, finely grated or melted and fitted/set into the diameter of your dessert rings (in case you’re going that way)
Both Dark and White Cocoa Powder
Any kind of fitting eye-candying paraphenalia like fresh Cherries, Chocolate chichi and/or Amarena Cherries
Lemon Thyme or Lemon Balm Leaves
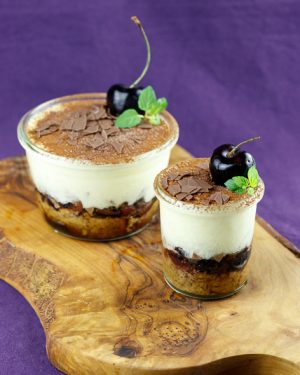
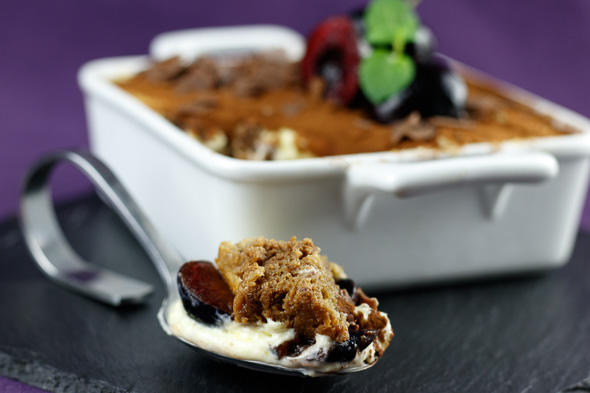
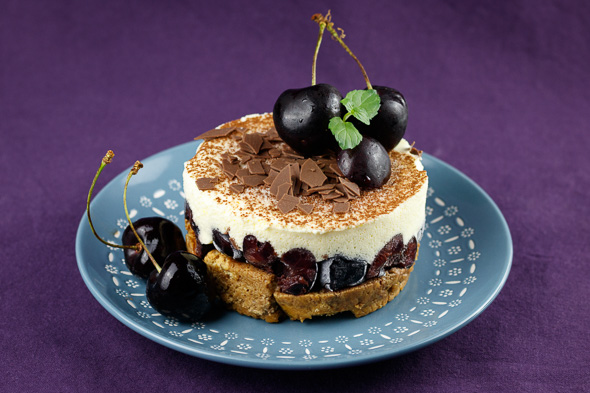
I’ve served this in about every possible way, from a simple family-style serve-yourself centerpiece casserole to neatly stacked eye-candy towers set in dessert rings and even as ice cream towers (after I tried to speed up the setting process with a quick visit to the freezer… and forgotten all about it until the next day. It worked deliciously well, though! Call it a “parfait” and nobody will question it). Anything works, really!
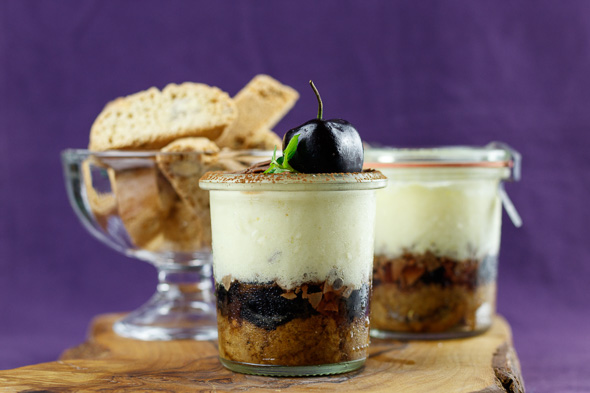
1) Anyways, pick your glasses/dishes/rings/bowls/tray for the occasion and get stacking~! Just one thing: if you plan on using rings or some sort of container to turn individual portions out on pretty dessert plates, don’t forget to give them a thorough rub with a hint of a neutral vegetable oil before getting started to make the process easier later on.
2) Start with the Cantuccini. Nudge and mold them together without squishing them too much. This layer will catch any liquids running down from above, so try to make it a “solid”, closed foundation to avoid any kind of seepage. This, of course, is especially important if you’re going down the dessert-ring/plate road and not all that essential if you’re serving the Tiramisu contained in individual glasses or bowls.
3) Distribute the marinated cherries in a second, somewhat “even” layer and dot the I with the cherry liquids that will no doubt have gathered in their bowl. Just make sure you don’t drown them at this point.
4) Seal this layer in with the chocolate disks I mentioned earlier or a fuss-free layer of freshly grated chocolate dust. In case you went overboard with the cherry liquids, dropping in some almond slivers will also help to keep the upcoming mascarpone layer from sinking into the cherry layer and loosing it’s integrity, taste and fluff along with the visual.
5) Here’s a little safety-cheaty hint: several chocolate manufacturers have ultra thin chocolate disks/squares dancing in the background of their product lines… when I’m dealing with dishes like this one, I always make sure to have a box of those in my pantry, juuuust in case~
6) So, once the borders are drawn, distribute the Mascarpone on top and , after a gentle tap to pop out any air pockets, smooth out the surface with the back of a spoon or a palette knife.
7) Cover your work with clingfilm and transfer it into your fridge.
8) Chill the freshly stacked up Black Cherry Tiramisu for at least 8-12 hours or, even better, overnight.
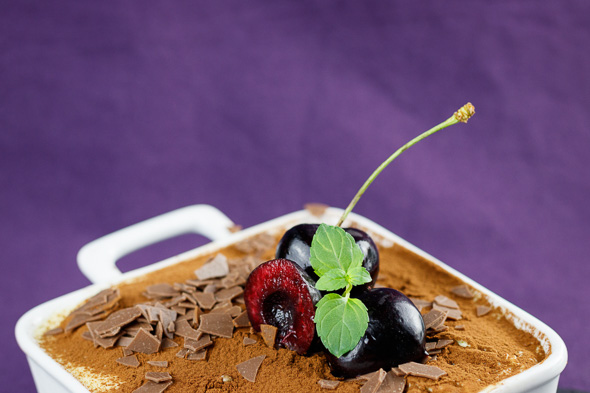
9) Just before it’s time to whet and wield your dessert spoons, give the surface a generous dusting with a blend of Dark and White Cocoa powder and the eye candy of your choice~
Enjoy~!
♥
