
 Chilli con Carne. In 35°C weather. You might think the heat in- and outside of the kitchen has finally taken it’s toll on my sanity. Well, believe me, I’ve considered an extended trip down to the looney bin on several occasions myself. This isn’t the result of slowly-stewing grey matter though, this is the result of the GW2 recipe list rudely kicking a part of my subconscious, usually hibernating during heatwaves, to life without offering it some coffee first.
See, my inner vampire and other, sane parts of me sometimes don’t see eye to eye. Said inner vampire also has the nasty habit of rearing it’s head at really inconvenient times, such as this one. It’s like craving a bowl of ice cream in the dead of winter reversed. I’ve given up shaking my head at both of those quirks long ago, accepted them and adapted. So, inner vamp demanding hot and spicy meat galore while the rest of me is screaming for a ice-cube filled tub to crawl into? Not so crazy – to me – anymore, and I’ve developed just the thing! A summer-version of a chilli con carne, a quick-fix really, low on fat, healthy and chilled follow-ups to boot. So, here goes, thanks to Tyria’s wake up call labeled…

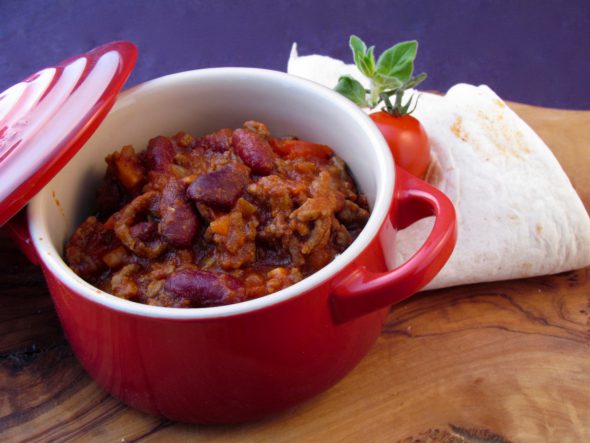
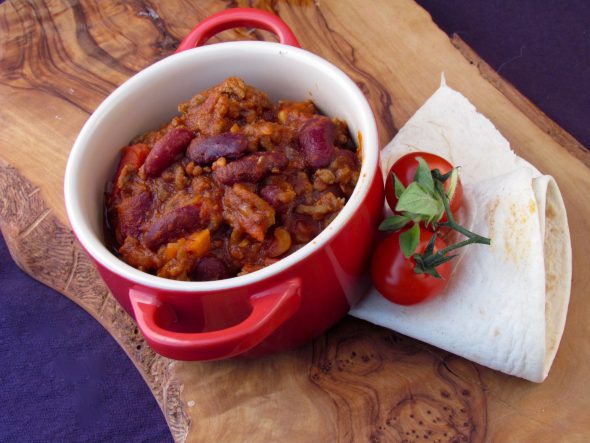
I was compelled to cook up this:
And this is how I did it without dissolving into a puddle of formerly-known-as-Nahdala in front of my stove:
The Chilli Con Carne Spice Blend
This one basically has two stages. Stage one goes without a lot of chillis and chocolate, assuming I’m using it straight away, adding fresh chillis and grated chocolate to the chilli in question. Stage two adds those ingredients in their long-shelf-life version to serve as kitchen presents or staple spice blend in my spice rack. I’m going to list both of the stages, of course, so you guys can go with whichever combination you like – also considering that some of the chillies can be harder to get fresh than others. As usual, if you’d like to make more or less of this blend, translate the „spoons“ into „parts“, a tbsp being 1 part, a tsp ½ a part.
Stage One, The Base:
5 Tbsp sweet Paprika Powder
3 Tbsp Pimenton/Smoked Paprika Powder
3 Tbsp ground Cumin
3 Tbsp ground Cayenne Pepper
2 Tbsp Sea Salt
2 Tbsp Black Pepper, freshly cracked
2 Tbsp dried Oregano
1 Tbsp dried Marjory
1 Tsp dried Bird’s Eye Chillies, coarsely ground or flaked
1 Tsp El Rey Chilli Powder
1 Tsp ground Cloves
1 Tsp ground Allspice
1 Tsp ground Cinnamon – if you want to boost the cloves, cinnamon and allspice, toast the whole spices in a dry pan on low heat until their aromas start filling your kitchen, then grind them up in a pestle & mortar or spice mill while they’re still warm.
Like I said, this one’s the base to add the fresh ingredients listed in the chilli recipe itsself to, namely fresh Habaneros, Chipotles, Jalapenos, Onion and Dark Chocolate. The fresh chillies add a completely new layer of aromas to your chilli con carne, even if you have their dried counterparts in the blend already, but you can work with what you have in the dried or fresh chilli area and see which combination works best for you. If you feel like replaceing the herbs with fresh ones, you’re going to need roundabout 60-80g each for them to make a difference in the end – add them to the chilli with the beans.
Stage Two, The Staple Spice:
All of the above, plus…
2 Tbsp dried Onions
1 Tbsp dark Cocoa Powder, unsweetened
2 Tsp ground Chipotle Chillies
1 Tsp ground Habanero Chillies – I’d like to point out… There’s a bright red warning sign on my airtight baggie of Habanero powder with an impressive amount of exclamation marks, rightfully pointing out the need to handle this stuff with care and to keep it away from children or other types of klutzes… <insert painful memory of said bag slipping out of my hands, resulting in a horrid cloud of burning dust in my kitchen>. In other words… be careful with this stuff and skip it alltogether if you’re sensitive to chilli heat.
1 Tsp ground Jalapeno Chillies
Quite the long list for a one-step instruction:
Place all of the listed spices and herbs in an airtight container, close the lid and shake it to evenly blend them together.
As always with my spice blends, the ingredients I listed are what I start with. The beauty of making your own spice blends is, aside from the shere fun of it, you can tailor them to fit your personal taste perfectly, the only snag being the inconsistent quality the individual spices and herbs naturally suffer from – but that, too, can be adjusted accordingly if you make the blend yourself.
Depending on which chillies I was able to hunt down fresh, how much oomph the spices develop while being toasted, and who I’m making the chilli or the spice blend itsself for I adjust the rest from there. If it’s just hubby and me, I usually stick to the list, just shifting around the chillies as the seasons dictate what’s growing in our area at that time – right now it’s the Habanero’s and Scotch Bonnet’s turn as the Jalapenos are getting rarer.
To taste-test this spice blend I recommend frying up a couple of chicken strips or unseasoned pinches of beef mince. Sprinkle them with the blend, give the spices a few minutes to develop in the heat, then have a taste and adjust the blend from there. Stirring the blend into sour cream or yoghurt would be easier, but in this case dairy products, seeing as they neutralize the capsaicin in the chillies, would mask the spice and guide you into the wrong direction. Unless you’re gunning for the „World’s Hottest Chilli con Carne“ Championship Title, of course.
Oh and just on a side note… I don’t mean to impose my spice blends on you guys, there’s quite a lot of really good ready-to-use spice blends for Chilli con Carne out there… If you found one you’re happy with, use a baggie and add some fresh chillies just for the jollies… I personally always found those blends to be a bit too bland for my taste despite all the fancy chemicals, thats why I started to make my own chilli blend in the first place.

The Summer Chilli con Carne
500g lean Beef Mince
100ml Beef Stock
100ml Whiskey – use a mild one for this, trying to use up the last swig in a bottle of Laphroaig that had been taking up space for months, untouched and forgotten, turned a batch of chilli into an inedible, pungent, turfy concoction neither of us wanted to eat. If you like the 10-ton fist-in-a-bottle that is the Laphroaig however… let rip.
400g Can of skinned Cherry Tomatoes, preserved in juice
1 Tbsp Worcestershire Sauce
250g Kidney Beans – a 400g can of Kidney Beans, drained and thoroughly rinsed – or
100g dried Kidney Beans – I’ll get to that in a bit
1 Onion, finely chopped
1 Tbsp Vegetable Oil
2 Tsp Brown Sugar
1 Tbsp Tomato Purée
3-4 Tbsp of the Base Spice Blend – see above – or
4-5 Tbsp of the Staple Spice Blend – leave out the fresh chillies and chocolate listed below in that case
1 Tbsp or 13-15g Dark Chocolate, 85% Cocoa Solids or more, finely grated – if you can’t get a chocolate with that high a cocoa solids percentage, leave it out, milk chocolate doesn’t do the trick
½ Habanero or Scotch Bonnet, finely chopped – careful with these if you’re not used to their punch
1 dried Chipotle Chilli, finely chopped
1 fresh Jalapeno, deseeded and finely chopped
Salt to taste
Lime Juice to taste
First order of business, enter the beans. As a kid I’ve been to several chilli cookoffs always being held at the various US Army Bases around our area during the summer festivals. The people competing in those cookoffs were sticking to some sort of official rulebook that apparently banned any sort of bean-ish veggies from the pots until the judges had passed their verdict. Before anyone would even get a chance to cheer after the rankings were announced, the sounds of cans being cracked and sealed jars being popped open were everywhere. Back then this just seemed ridiculous to me, why not cook the stuff as it’s meant to be eaten and give me my bowl of chilli, pronto! At some point, I realized that adding the beans during the competition would probably make the life of the judges and their tastebuds a living hell, as everyone could work their magic with the beans before the competition even started, steadily dwindling away the common grounds on which to judge the dishes on. Shortly after I sherlock’ed the importance of the beans from that moment of insight, I started experimenting with the beans for my chillies, quickly arriving at the point of leaving the world of canned goods behind and moving on to dried beans. Don’t get me wrong, there’s nothing to be said against a can of kidney beans if you found a brand or type you like, you can just do a lot more to dried beans to tweak their flavor and texture, go wild with spices on the brine and soaking/cooking times, but that’s just food for thought at this point – this one is all about minimizing effort and kitchen time. The one thing I do whenever my inner vampire actually lets me plan ahead at least a day – a not too-hot day at that – is the most obvious and fuss-free thing to do to literally „beef up“ dried beans: I simply swap the water I would nomally soak and simmer the dried beans in with beef stock. If you’re going with dried beans, you have to soak them for at least 6 hours and cook them for quite a long time before using them, which is why this is more of a thing to do during colder times of the year. The dried beans I use, 100g translating into 250g canned ones after being prepped, need a 10 hour soak and a 1 hour simmer to reach the point of being used like canned ones. These times vary a lot from brand to brand, so make sure to check the instructions on the package at hand if you’re going down that road. If you’re going with a can of beans just rinse them thoroughly to remove their preserving liquid.
1) Take the mince out of the fridge an hour prior to getting started and spread it out a little bit, then give it a generous sprinkle of salt and pepper.
2) Set a heavy-based, non-stick pan with a fitting lid on high heat and let it sit on the stove for 5-6 mins to get it to its max temperature before doing anything else. You want the meat to brown and crisp up quickly, not to cook and turn grey.
3) Divide the mince into 4-5 piles. You’ll be frying the batches off one after another to quicken up the process and to really get some color on it – overcrowding the pan would lower the temperature down too far for the crisping-up bit to be possible.
4) Separate the strands of the mince while crumbling it into the pan and continue to seperate the meat into small kernels with a spatula while it’s taking on color.
5) As the meat is merrily frying along, remove any and all excess fat and water from of the pan by tipping it sideways and scooping it out with a spoon. This gives the finished chilli a wonderful texture, degreases the whole thing and kinda-sorta shortcuts one of the points of low-and-slow’ing a Chilli con Carne. Rather than low-and-slowing it to infuse both the tomatoes and the meat with eachother, you’re basically squeezing out the moisture in the meat to make space for the tomatoes and spices to crawl into really fast. Sounds kind of brutal, but well hell, so are the temperatures outside.
6) Fry the kernels until they’re evenly browned and crisped up – they will start to snap, crackle and pop in the pan to indicate it’s around their time to move into a fine sieve to drip off the remaining moisture while you’re frying off the rest.
7) Once you’re through with the last batch of meat, add a tbsp of vegetable oil, the sugar and the onions. Sautée them, until they start to caramellize – about 3-4 mins – then add the chillies and let them do their thing for another 2 mins with the lid on.
8) Deglaze the pan with the whiskey – don’t take a step back from the stove in case you fancy getting all fuzzy and light headed from the alcohol burning off in a burst of aromatic fog~
9) Once it has reduced down a bit, add the stock and let that simmer down a bit as well. By the way, in case you’d like to make the beef stock yourself, but don’t know how, check out my version of it here.
10) Pop the mince back into the pan, along with the spice blend, chillies, tomato purée, the Worcestershire Sauce and the contents of your can of tomatoes. Bring the lot to a gentle boil, then reduce the heat to low and place the lid back on the pan.
11) Let this simmer away for around 10 mins, then remove the lid and add the beans. Fold them in gently to avoid breaking them up and close the lid again. Let them warm through in the chilli for 4-5 mins.
12) Go through the taste-adjust routine, add a splash of lime juice and a pinch of salt to accentuate the tomatoes and take it from there. Check on the consistency of the chilli while you’re at it. Depending on how you prefer it, lots of sauce or a thick coat around everything, take off the lid to give more moisture the chance to evaporate or keep the lid on for another 5 mins. I usually take the lid off at this point, simply because my fabulous clairvoyant abilities almost always let me forsee wraps, burritos, lunch boxes or other non-messy things like next weeks follow-up in the near future of the contents of my pan~
13) Just before serving, stir in the grated chocolate and make sure it’s evenly distributed. You might think 10g of chocolate won’t have much impact on a pot of chilli, but it’s not supposed to jump out at you. It basically acts like a bitter-ish, sweet-ish version of salt, it just adds that special something you can’t really put a finger on, the dot on the i, if you will. This used to be one of those „secret ingredients“ or „chef’s magic“, often listed in traditional recipes and nowhere else, but recently I’ve noticed dark cocoa powder popping up on ingredients lists of convenience spice blends up and down the whole price range, so it’s actually not that much of a mystery anymore.
14) The quickest way to serve the chilli is to open a package of flour or corn tortillas – I couldn’t get myself to fry up my beloved purple corn tortillas today, so I’m holding that one back for my winter chilli – and dot the bowls with some crème légère or sour cream just before dishing up. Fresh cherry tomatoes or radishes make superb accompaniments as well.

I hope you guys like this one and check back for next week’s follow-up on this one, combining leftovers and a somewhat unusual twist on a classic.
Enjoy~
♥
