
 Like I’ve told you guys already, I’m not really the sweets & junk food kind of girl, but there’s one thing, one oh-so insignificant product, I’m having my fair share of trouble to resist. A product that has been widely unavailable and unknown in these parts of the country during most of my early childhood, despite the masses of american soldiers still stationed here at the time – Peanutbutter.
When I had my first – that I know of – Reese’s Cup at the Summer Festival on one of the Army bases around town, I finally realized what I had been missing my entire childhood. The bliss! When I got back home and told my mother about this amazing discovery, she gave me an exasperated sigh, slightly tinged with a hint of raw panic. „Oh my… the american genes are kicking in.“ Well, what can I say. As long as my genes don’t make me crave Oreo’s covered in this area’s signature Horseradish Sauce, I’m absolutely fine and dandy with both sides of my genetic makeup, thank you very much.
Since then, of course, PB, and Oreo’s for that matter, have become a common sight, and, as I’ve grown older, I’ve learned to control the urge to attack my hidden PB stash with a ladle. In fact, that stash is touched only once or twice – how’s that for moderation? – a year to create these yumtastic little cubes. They take the crowdpleasing crown every time I make them, so I thought I’d spread the joy beyond the borders of my little kitchen and its usual suspects and share this one with you guys.
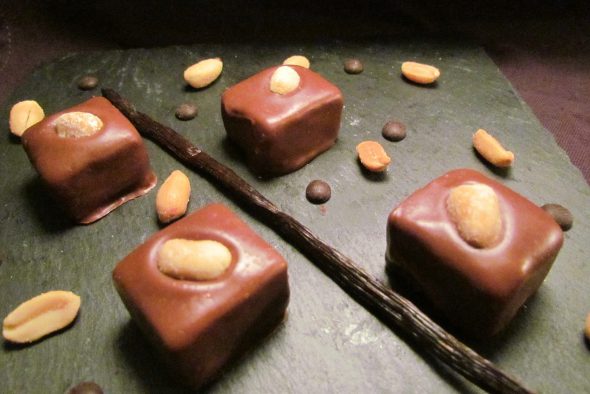
Peanutbutter Chocolates
For an average sized Brownie Tray, ready to be cut in whatever size or shape you want them, you’ll need…
150g unsalted Butter
300g mild 70%-80% Chocolate
200g Butter Shortbreads
75g Wholegrain Cookies
or: 250g Digestive Bisquits
200g Light Muscovado Sugar
300g Crunchy Peanut Butter
1 Tsp Vanilla Extract
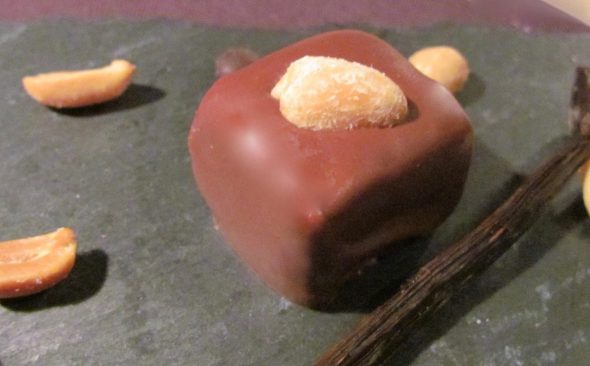
Salted & Roasted Peanuts as finishing touch-ups
20×20-23cm Brownie Tin
1) Line the brownie tray with baking parchment. Make sure to leave an excess of at least 5-10cm of parchment hanging over 2 opposite sides of the tin – these flaps with act as handles later, helping you to get the firmed up filling of the chocolates out of the tin in one piece.
2) Place the butter inside a small pot set on low heat. Once it has dissolved completely, set the pot aside for a couple of minutes to cool down a bit.
3) Meanwhile, finely grind the cookies with a pestle & mortar, pop them in a zip-lock and have at it with a rolling pin or whizz them into cookie dust in a food processor. Whichever method you pick, make sure the cookies come out as a fine and evenly ground cookie-sand.
4) Move the cookies into a large mixing bowl and stir in the sugar.
5) Carefully pour in the butter near the edges of the bowl, stirring occasionally to distribute the liquid quickly throughout the crumbles. It doesn’t have to be perfectly incorporated, just make sure you distribute the butter before larger amounts of your cookies start to glob up.
6) Add the peanutbutter and vanilla extract to the mix and get yourself a free kitchen-workout, stirring the mixture with a wooden spoon until everything is evenly distributed and has come together in a smooth dough of sorts.
7) Pour the mix into the brownie tin and, to help it firmly settle down in the tin, press it down and into the corners with the backside of your spoon.
8) Tap the tin on your work surface a couple of times to remove air pockets inside the mix.
9) Carefully even out the surface by gently brushing it with the backside of your spoon again.
10) Pop the peanut brick inside its tin into the fridge and leave it in there to chill through and set in for 3 hours.
11) Once that’s done, lift the „brick“ out of the tin with the help of the baking parchment handles.
12) Place it on a large cutting board, remove the parchemnt and cut it into similar sized squares with a really sharp knife. If the dough is giving you a hard time on the cutting board, heat the blade of your kife under running, hot water, quickly wipe it dry with a cloth and have at it. This is actually the fun part – when it comes to cutting and shaping these yummies you can basically do as you please, your kitchen gadgets are the only limit. I usually cut them into ca 1,5cm squares, as that’s the perfect one-bite size, and therefore snugly fitting into my chocolate boxes. I went out of my way a couple of times, attacking the brick with cookie cutters, heart-shaped ones for Valentine’s, for example. Just don’t use cutters of the small and/or intricate variety, since the filling, thanks to the cookies involved, can turn out rather brittle and crumbly, what with it coming fresh out of the fridge and all that.
13) Meanwhile, melt the chocolate in a waterbath. As usual, make sure the water isn’t reaching its boiling point and the bowl isn’t touching he surface of the water to prevent the chocolate from overheating. Set the bowl aside to cool down to room temperature while you’re finishing up the knifework.
14) Use a long pronged fork, or chocolate fork in case you have one, to carefully drag the cubes through the chocolate, coating them all around in the process.
15) Lightly tap the fork on the rim of the bowl to make excess chocolate drip off. I usually place a chopstick across my bowl of chocolate to speed up the process by „wiping“ the bottom of the fork with the chopstick up to get rid of the chocolate drippings faster – if you’re going through a large batch of things-to-be-coated, speed is key if you want to avoid having to re-heat the chocolate somewhere down the line. Plus, the chocolate dripping down from the chopstick back into the bowl keeps the rims of your bowl clean, and leaves you with less chocolate wasted.
16) Place the freshly coated cubes on a large tray lined with baking parchment. Leave around 1-2cm on space between the individual cubes to be on the safe side – runny chocolate, klutzy moments, rising temper, elbows… all hazards that can be easily avoided by leaving enough space… someone remind me of that next time, please.
17) Set one peanut half on top of each cube while the chocolate is still wet and lightly press it down into the coating.
18) Good news for all of you guys either not too close and personal with the concept of homemade chocolates or the ones with a sweet tooth but not much time to spare! Theres a quick-fix version for these, skipping over most of the chocolate-coating-shindig.
After chilling the contents of your tin, prick the dough with a fork all across the surface.
Cut the 300g of chocolate down to 200g, melt it and leave it to cool down.
Pour the chocolate on top of the filling while it’s still in the tin. Place it back in the fridge to chill for another 2 hours, then use a heated blade to cut the cubes.
You will have to cut out bigger squares using this method, since not only will the filling end up a little bit more on the crumbly side of things, but the chocolate will break loose of the dough more easily, the smaller the surface it can stick to ends up being.
19) Whichever method you’ve picked to get to this point, place the freshly cut and/or coated chocolates on their tray someplace cool and out-of-harm’s-way for another 2 hours to set before moving them into an airtight container. Keep them refrigerated and you’ll have a box of guilty pleasures keeping you warm and fuzzy around the tummy area for around 2 weeks.
Enjoy
♥
