
 Happy New Year! I hope you guys had a blast welcoming 2017~! If you had the kind of party we had, your tummy and your head might just feel a bit on the fuzzy side of things, just like mine do… I have to admit, I never had a “real”, movie’esque hangover, so I can’t give any educated expert advice on the usual hangover-foods, but as a general rule of thumb, listening to your stomach never hurts when something’s amiss. Doing exactly that with my head in the fridge resulted – to everyone’s surprise – in me whipping up an omelette, something I haven’t done in years.
I was just about to give up the foraging trip though my fridge since absolutely nothing seemed to appeal, when I spotted a couple of eggs and suddenly had my tummy growl in appreciation. Well, whaddayaknow! Another glance around the kitchen and a few braincells into the general direction of the Guild’s list of egg’licious dishes for further inspiration, I was able to serve up a dish that, evidently, everyone had craved without knowing~


Here goes, my perfect, GW2-inspired New Year’s brunch dish!

The Dressing
Whenever I use dried herbs in a dressing, I prep it at least half an hour before using it to give the herbs the time they need to “revive” and infuse the liquids with their aromas. So, get this one out of the way first~
2 Tbsp mild White Wine Mustard
2 Tbsp Apple Cider Vinegar
1 Tbsp Olive Oil
1 Tbsp Honey
1 Tsp Herbs de Provence
Salt, Pepper
1) Add all of the ingredients for the dressing to a small bowl or dressing-shaker-gizmo/jam jar and have at it with a whisk or vigorous shake until the honey has dissolved.
2) Tuck the bowl or container into the fridge until you’re ready to serve.
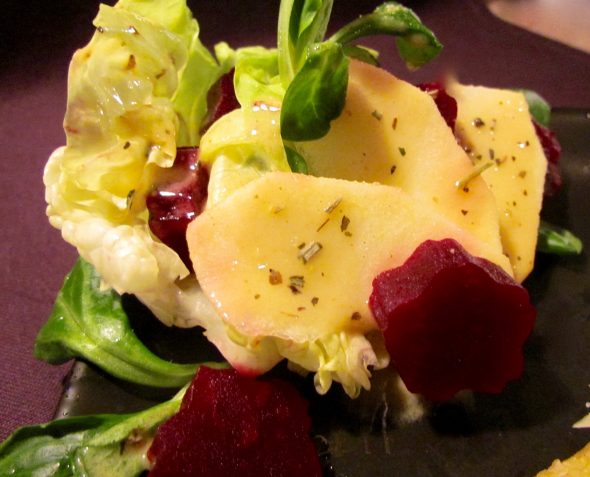
The Salad
200g Lettuce Leaves
1 Apple, peeled, cored and finely sliced or cubed
1 Beetroot – one of the precooked and vacuum-sealed kind you can find in almost every supermarket.
2 Tbsp finely chopped Chives
1) Cut or rip the lettuce leaves into bite sized pieces and place them in your serving bowl. You might not want to toss the salad before you serve it since the beet will turn everything into a pink mess.
2) Scatter the chives onto the leaves.
3) Sprinkle the apple cubes with salt or place them in a bowl filled with ligtly salted water until just before serving – this will keep the apple from browning in the meantime. I know, the Tyrian recipe doesn’t list apples for this, but for me beets and apples are the perfect companions in a salad. The apple takes off a bit of the earthy sweetness of the beets, balancing out the whole thing without adding more acidity through a sharper dressing.
4) Finely dice the beetroot… or be silly like me and use a mini-cookie cutter to shape them! Let’s hear it for the first girly moment of the year~
5) Once you’re ready to plate up, arrange the beets and apple cubes evenly on top of your leaves, drizzle the lot with the dressing and serve.
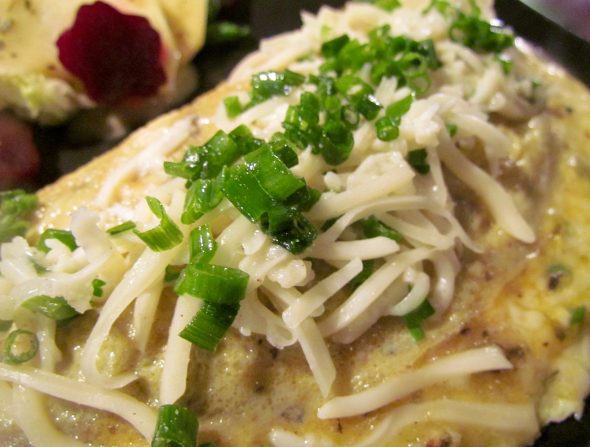
The Omelette
Usually I would use 2 eggs per person and fry them up in my small 20cm DIA pan for individual servings – this time, since I wanted to pop it onto the brunch table in a kind of cut-it-yourself-style, I used 6 eggs and my large 28cm DIA pan.
6 eggs
120-130g coarsely grated Cheese – leftover-time! Basically you can use whatever cheese you fancy or a cheese fitting your other filling-choices (check below for other yummy filling suggestions), just make sure you combine a softer cheese with the harder ones for optimal cheesy-oozyness. In this case I used a few scraps of Yoghurt Camembert, aged Irish Cheddar for some oomph, some Gouda and a few strands of an intense Mountain-Cave Cheese on top of the omelette.
2 Tbsp Low Fat Cream Cheese or Crème Légère
2 Tsp Butter
1 Tbsp finely chopped Chives or Parsley
Salt, Pepper, Nutmeg and Herbs de Provence to taste
1) Take the eggs out of the fridge 1-2 hours prior to using to keep the omelette from frying up unevenly.
2) Crack the eggs into a mixing bowl and add a pinch each of salt, pepper and herbs. Use a fork to lightly beat the egg mixture until the herbs are evenly distributed. As soon as they’re well blended in, stop whisking – overworking the mix will result in a rubbery omelette.
3) Place the grated cheese in a large mixing bowl and gently stir in the chives and cream cheese or crème légère. Season the mix with a pinch of salt, a good crack of black pepper and some freshly grated nutmeg as you go. Since there’s way more “dry” cheese than “wet” ingredients, use the chives as an indicator for your finishing-line. Once they’re evenly distributed throughout the strands of cheese, you’re ready to fire up the pan.
4) Set a large, heavy-based pan – or a small one for individual portions – onto medium heat and melt 1 tsp of butter. Use a pastry brush to evenly spread it across the bottom of the pan and about 1 cm up the sides.
5) Pour in the egg mix.
6) Once the mixture starts stiffening, pick up a fork or small spatula to drag the outer rim of the omelette into the middle. The raw mixture on top of the lightly stiffened bits will flow into the recently vacated prime-spots in the pan, creating a firm and crispy base for the fluffy egg-pillows you’ve just created.
7) To keep the pillows from clumping up in the middle of the omelette, loosen them up with your fork and spread them out evenly. Tip the pan to direct the runny bits into the gaps, closing them up in the process.
8) Once the omelette is about 75% done – the bottom closed up and the top-side showing first signs of the glistening moisture stiffening up – flake in the remaining butter along the rim of the omelette. Carefully lift the rims with the tip of your spatula to let the flakes slide under the disk. Turn off the heat.
9) Cover one half with the cheese mix – don’t stack it up too high if you want it to close properly – and mentally prepare for the iffy part.
10) Option 1: Fold the other, un-cheesed half over the half holding your filling with the help of a large rubber spatula.
Option 2, the chef’y way: Flip the lid-half on top of the filling by well… flipping the pan, using the the rim of the pan as a sort of makeshift ramp to fold the top half to cover the filling – just as if you were trying to flip a pancake halfway, but very slowly and carefully.
11) Once it’s safely folded, top the omelette off with a couple of chives or leftover cheese mix and gently slide it out of the pan, onto a large serving dish.
12) Give the cheese inside about 3-4 mins to melt between the hot, eggy covers, then sidle a helping of the salad up to it and dig in~
Enjoy~
Tried, tested and hubby-approved alternative fillings:
Mozzarella – for once, don’t use buffalo mozzarella, sadly it’s too wet for this kind of thing – dried tomatoes or red pesto and parmesan, a dash of basil in the egg mixture.
Gruyere, mixed wild mushrooms, parsley.
Sheepsmilk feta and baby spinach, nutmeg and lemon zest in the eggs.
♥
