
 Very recently, on a seriously uncomfy hot and humid day of all inconvenient times, one of those off-the-rails cravings decided to settle in the tummy-area of my head. Much like the bewildering urge to have a bowl of ice cream in the dead of winter, my once-or-twice-a-year “Cake! Now!” hellspawn waltzed in and demanded immediate attention when I least expected it.
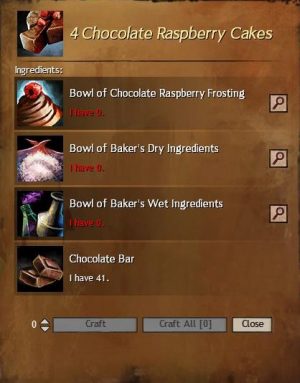
So, while following up on the idea seemed the right thing to do to shove the demon back into its box, the potentially mouthwatering display at a nearby Pâtisserie miraculously failed to appeal – usually I’m eyeballing that same display, wishing I would actually be in the mood for one of these beautiful, decadent sweets to make it worth the exploding calorie-count… Since, evidently, none of these treats would truly satisfy my frustratingly vague or simply undecided cake demon, I trudged back home instead, in order to check in at the Chef’s Guild Station in Lion’s Arch – the one source that never failed to push me in the right direction in the Cakes & Sweets department. And, voilà, 2 mins at the screen and an appreciative purr from my cake demon later, I had found what I was looking for~! I pounced on this delicious morsel off of Tyria’s Menu…
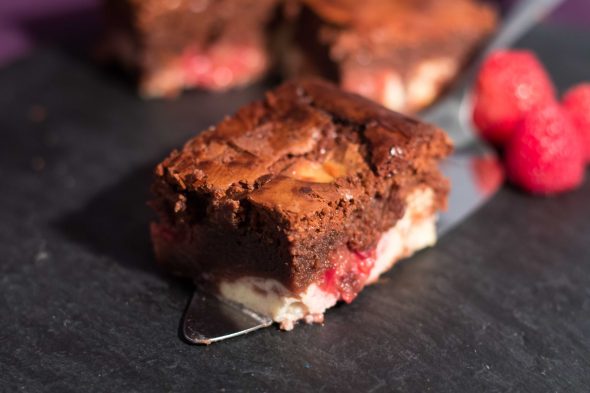
…and browniefied it! Juicy, chocolatey with a fresh burst of very-berry yum, here’s the lovechild of a Chocolate Tart and a Cheesecake – my Raspberry-Chocolate Cheesecake Brownie! It’s not as messy as it sounds, by the way – it consists of two simple and quickly made dough mixtures that will meet in the tin with just a few flicks of a spoon.

The Brownie Dough
200g Dark Chocolate, 70-80% Cocoa Solids
150g Butter
200g Fine
Caster Sugar
25g Light Muscovado
3 Medium-sized
Eggs
1 Vanilla Pod, seeds only
Alt: 1 Tsp of High-quality Vanilla Extract
75g All-Purpose White Flour
1 Pinch of
Salt
1) Pop a heatproof bowl onto a small pot of lightly simmering water and add the butter and chocolate cubes. Make sure the bottom of the bowl doesn’t touch the surface of the water and the water doesn’t start to boil beneath the bowl to ensure the mixture inside the bowl doesn’t overheat.
2) Gently stir the butter and chocolate mixture with a rubber spatula until both components have dissolved and merged into an even, silky-smooth blend.
3) Sift in the sugar and keep up the stirring-action until the grains have dissolved completely.
4) Take the bowl off the steam and add the eggs along with the vanilla seeds or extract and, again, keep stirring until the newest additions to your dough are well incorporated.
5) Sift in the flour and salt, and gently fold them into the mixture until everything is well combined and lump-free.
6) Set the bowl aside for the time being and move on to the easy-breezy cheesecake component while this one’s cooling down to room temperature.
The Raspberry-Cheesecake Dough
50g Fine Caster Sugar
1 Medium-sized Egg
300g
Cream Cheese – if you’re experienced with using low-fat cream cheese in cake-related scenarios, please tell me your secret~ I gave up after several attempts had gone sideways… literally. 1/3 low to 2/3 full fat cream cheese was the max of what I could keep from… running away.
200g Fresh
Raspberries
1) Place the cream cheese and the sugar in a bowl, pick up an electric whisk-o-matic and whirr the lot into a smooth and fluffy, non-grainy mixture. Dot a fingertip with a bit of the mixture and rub it against your thumb to check if the sugar has dissolved in case the noises in the bowl aren’t much of a help in that department.
2) Add the egg and, with the beaters set to medium speed, blend it into the cream cheese mix.
3) Once the egg’s well incorporated, set the handheld aside and gently fold the raspberries into the mix with the help of a rubber spatula.
4) And that’s that! Set the bowl aside, out of harm’s way and get ready to assemble the brownie.
Finishing the Brownie
60-80g Fresh Raspberries
Opt: Icing Sugar to dust the finished Brownie just before serving
1) Preheat your oven to 180°C.
2) Lightly grease a 20-23cm square brownie tin and line it with a sheet of baking parchment. Make sure, the parchment hangs off the sides far enough to pose as a convenient lever later.
3) Pour the chocolatey dough into the tin and distribute the cheesecake dough on top of it in evenly spaced dots or, alternatively, drip the doughs into the tin in a chessboard kind of way. The “Design” hinges on the temperatures of the two – if the brownie dough is still a bit on the warm side, it’ll be on the runnier side of things and the cheesecake mix will sink in all the way through to the bottom.
4) If the cheesecake mix is just a tad too warm, it’ll spread out very fast, so the chessboard style would require you to work on full speed. With 4 arms. I’ve resigned myself to simply go with the dough-flow on this one. The outcome, however, always turns out delicious, no matter how thick or runny the doughs were going into the tin.
5) Use a chopstick, wooden skewer or spoon to lightly marble up the two components by dragging the tool of your choice through the mixtures, swirling the doughs into each other. Don’t overwork it, though, you don’t want to blend the two into one.
6) Dot the surface with the additional raspberries and gently wriggle them, their opening facing up or sideways – so the dough has a chance to fill them up before it sets – into the dough.
7) Pop the tin into the preheated oven and bake the brownie for 35-40 mins.
8) As with any cake, test-poke it with a toothpick to see if it’s done… hang on. Yes, the toothpick-test does apply, but not as with any other cake. I suppose it’s time for a little Brownie-101~! Since it’s almost done anyways, feel free to skip this part if you know your way around brownies~

101: How to tell when your Brownie is done – Brownies in a nutshell
101.1) First off, brownies are supposed to have a a crackling, leathery-looking exterior and a fudgy-moist, rich, maybe a little gooey in the center, kneebucklingly… I’m sorry, I’m at a loss for a better word… “mmmmmmh~!” interior. Slightly, very slightly that is, underdone is always better than overdone.
There are two ways to tell whether a brownie is done or not: a getting a close-up visual and the toothpick-check.
101.2) The visual checkup is easy: The surface of the brownie should be set – wriggle the tin lightly to check – smooth and shiny in in the middle of the tin and crinkle up towards the edges and corners. Take the tin out once the first flakey cracks appear in the area towards the rims, no matter how long your recipe tells you to keep it in. The residual heat will do to finish it to glorious, fudgy yum.
101.3) The toothpick-check – a wooden pick or skewer poked right smack in the center of the brownie after the minimum baking-time has passed should result in a toothpick dotted with moist crumbs sitting on the tip of the lightly dough-colored wood. If that’s the case, you’re golden. Take the tin out and leave it to cool off.
101.4) If there’s only a smear of dough-colored wetness on it, the brownie’s underdone. Pop the tin back in for 5 mins before poking it again.
101.5) If the pick comes out squeaky clean, you should consider starting a second batch – this one’s overdone. Overdone brownies, unless you’ve seriously killed and nearly burned them, aren’t inedible per se, if a little dry, when they’re still a bit warm, but they’ll turn into solid bricks before you know it.
101.6) If your brownie contains either solids like nuts or chocolate chunks, or wet components like the raspberries in this one, use a second or third pick to verify the result of the first one, just in case you’ve hit one of your additions. Spearing a raspberry would tell you it’s way underdone while the dough itself might slowly be turning into concrete.
101.7) Since temperatures inside an oven – and in between different ovens, for that matter – can vary by several degrees, no matter which temperature you’ve set them to, placing the tin in the center of the middle rack and rotating it by half a turn every 10-15 mins will greatly improve the chance of a great result~
I know, a 101 like this from someone who’s not exactly known for extensive practice in oven-related things, even less known for baking or eating cakes, might seem a little odd, but going by these little pointers has netted me a flawless track-record with brownies so far~! Well, almost – the thing about wet’ish additions, in that particular case cherries, was something I had to discover the hard way~ I hope I was able to help you guys with this! Anyways, back to the recipe~
9) Once all indicators point towards the brownie being done, take the tin out of the oven and leave it to cool down while it’s still inside the tin before slicing it into the signature brownie squares. Normally, brownies are too good to resist digging into while they’re still a bit warm, but the cheesecake component in this one needs to set completely before you can cut it without making a major mess. If you don’t plan on sharing or keeping a few slices for the next day, however…
…Enjoy~!
♥

I’m a big fan of chocolate brownies with cheese/fruit. I usually add the cheese layer on top, but love your version when it is at the bottom. Will give it a try next time! 🙂
LikeLiked by 1 person
Yay 🙂 I’m glad you like it~! The first time I made this one many moons ago – also the first time I ever used a cheesecake component in a brownie – I sort of chickened out since I didn’t know how the cream cheese on top would work, bake, look or taste in the end, so I completely hid it beneath the chocolate layer. When that turned out deliciously well, I proudly went with the chessboard/chopstick routine and stuck to it ever since 😀
LikeLiked by 1 person
If it works – stick with it. 🙂
LikeLiked by 1 person
I must try this!! Unfortunately, fresh raspberries are not common here and costly so I am thinking about using my strawberry confiture instead….
LikeLiked by 1 person
Strawberries work too! 😀 That is, if they’re intense enough to hold their own against the chocolate~ If you’re using a confiture, try working it into the cheesecake mix rather than dripping it in on it’s own – that should minimize the chances of everything falling apart at the fruity seams~ The raspberry replacement of my choice are cherries, by the way 🙂
LikeLiked by 1 person
Oh, cherry works too? That’s a great option!! Danke sehr! 🙂
LikeLike
It looks and sounds amazing. I’m a bit confused though … forgive the dumb question but you say you put the brownie mix in first and topped with the cheesecake but the pix look the other way round … is that just because the latter has sunk? Thanks! Lx
LikeLiked by 1 person
Ooops! Now that you mention it, the pieces I’ve picked really make it look that way… I suppose, that’s what I get for being so excited about hitting a raspberry right down the center on my first slice. I went with the chessboard-drip/chopstick-drag method on this one and, evidently, picked the slices with the chocolate mix dragged over the cheesecake as my showpieces… In any case, the cheesecake mix does sink into (but not all the way down to the bottom) the chocolate component a bit as soon as the temperatures in the oven start to warm up the tin – the lighter, slightly sunken in area on top of the slice in the front is one of those cheesecake swirls frozen, or rather: baked, in place on it’s way down.
LikeLiked by 1 person
Ah! Gotcha. Thanks. (A bisected raspberry, eh?) 😀
LikeLiked by 1 person
Yep~! 😀
LikeLike