
 As you can imagine, limited access to something calls for a to-do list, allowing for a somewhat organized pounce on the rare occasion. In my case, that „something“ is, of course, an oven, and of course I have a to-do list slowly growing to the length of Gandalf’s beard. Honestly, at some point, I’m going to buy a kitchen… and build a hourse around it. Anyways, a large chunk of the items on said to-do list has been added to it by the Tyrian Chef’s Guild – from savoury casseroles all the way down to soufflés, there’s just so~oo many oven-yummies waiting to be brought to this side of the screen~!
On one of the rare occasions calling for the list to be pulled out, I had this wonderful 4-stage plan laid out, involving hot pockets, a roast, a tarte and something for the storage boxes… just to find myself staring at the oven in question, suddenly in the mood for a comfy day, a curl-up-on-your-couch-with-a-book mood, if you will. I couldn’t just leave the oven standing there though, now could I? I didn’t want to insult it, after all. Plus, comfy-days are always better when there’s something sweet involved~! For some odd reason, while I was going down my quality-oven-time-list for inspiration, the Tyrian version of one of my less favourite sweets caught my attention with sugary claws and wouldn’t let go – Chocolate Chip Cookies.

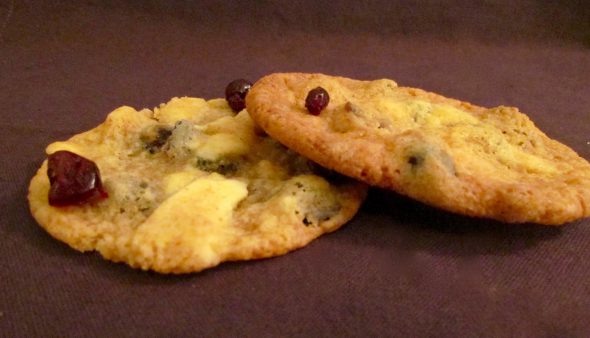
Don’t get me wrong, it’s not that I don’t like cookies per se, I’m simply kind of a cookie-snob and in recent years the quest to find cookies yummy enough to justify the sin has become ridiculously hard for no good reason – it’s been around 6 years since I had one of a sufficiently knee-buckling quality, I think… Well, what better way to get exactly what you really want, than to make it yourself? Since I’ve never been a fan of the classic chocolate chip cookie, I dug up my tried and tested White Chocolate Chip & Cranberry Cookie recipe, and, after a short bustle, spent the rest of the day worming my way through the book… and a stack of cookies!
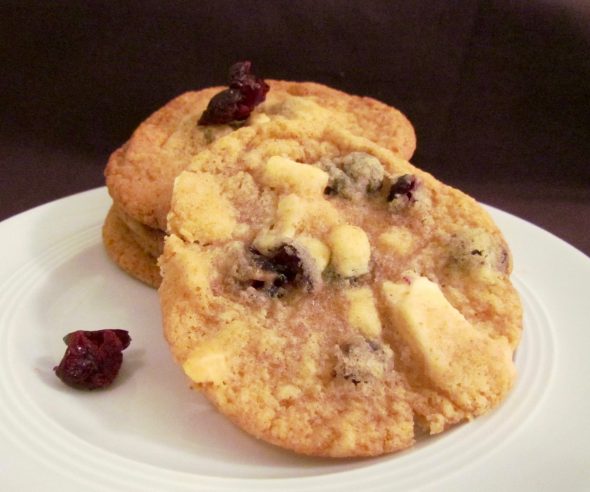
The White Chocolate Chip & Cranberry Cookies
These amounts will net you 15-25 cookies, depending on their size
225g Butter, at room temperature
225g Light Muscovado Sugar – you could use normal caster sugar as well, but the muscovado adds a wonderful caramel note to the whole deal, taking these cookies to another level.
2 Eggs
1½ Tbsp Vanilla Extract
1 Tsp fine-grained Salt
1 Tsp Baking Soda
½ Tsp Baking Powder
300g plain Flour
300g White Chocolate, coarsely chopped – keep it in larger chunks, if it’s chopped too finely, it will disintegrate and blend into the dough
200g dried Cranberries
1) Preheat your oven to 175°C.
2) Line a large baking tray with a sheet of baking parchment and set it aside.
3) Sift the flour, salt, baking soda and baking powder into a bowl just larg enough to hold all of the ingredients and set it aside, within easy reach but out of harms way.
4) Place the butter and both types of sugar in a large mixing bowl.
5) Set your handheld whizz-o-matic to medium speed and start whisking them together. Keep whisking until the creamy butter mixture is well combined and the sugars have almost completely dissolved – this should take around 3-4 minutes.
6) Turn the whisking speed to low and add the eggs one at a time. Make sure the first egg is well incorporated into he mix before adding the second.
7) Add the vanilla extract alongside the second egg.
8) Turn the speed up to medium once the second egg and the vanilla are nicely blended into the mix and keep whisking until the texture of the dough turns smooth and even. This turn takes around 30-60 seconds.
9) Turn the whisks down to low speed, keep the whisks near one rim of the bowl and slowly shake in the flour mixture near the opposite rim – to avoid flour clouds poofing out of the bowl and giving your face a budget version of a geisha makeover.
10) Once all contents of your flour bowl have met their destiny in the bowl holding your wet ingredients, turn the speed to medium again and whisk until the dough is perfectly smooth. 1-2 mins should be enough to get there.
11) Scatter the cranberries and chocolate chunks into the bowl and use a rubber spatula to fold them into the mix.


12) Have a good look at your dough – if you take a knob of it out of the bowl with a spoon, it should keep it’s heapy shape on top of the spoon. If it oozes apart, chill the dough before continuing – it would melt and spread out, and thereby dry out and possibly burn, way too quickly if you’d try to shape and bake it at this point.
13) I usually use my ice-cream scoop to portion the proto-cookies onto the baking tray – that way the cookies turn out to have a DIA of around 5-6cm. If you want them a bit smaller, pick up a smaller blob with a tablespoon and use a second one to mold it into a ball of dough.
14) Whichever method you pick, scoop up similar sized portions of the dough, roll or shape them into balls and place them on the lined tray, leaving a rim of around 3cm around each of them. They will melt and spread out a bit, but an empty space of 5-6cm between the individual blobs should be enough to keep them from melting into eachother. If you want to make extra sure you’re not going to be facing one tray-sized cookie in the end, simply pop one portion onto a second tray and bake it to see how far it spreads out.
15) For the perfect gooey, chocolatey and fruity cookie-yumsperience, bake them for around 8-9 mins in the preheated oven – the best visual indicator for the oven-time well used is a thin, golden-brown touch to the rims of the cookies.
16) Make sure not to over-bake them. In my experience, they always seem to be a little bit underdone at the time they’re due to leave the safety of the oven – but turn out perfectly in the end.
17) They are quite soft when they first meet the outside world, so allow them to cool down on the tray for about 5 mins before gently picking them up with a spatula to transfer them to a cooling rack. If you don’t have a cooling rack at hand, simply use one of the oven racks – they need to be able to „breathe“ on both sides as they’re cooling down – otherwise they could gather up moisture beneath them and turn soggy.
18) Once they’re cpmpletely cooled off, place them in an airtight container to store them – or dig in right away!
Enjoy~!
♥
