
 Looking out of the window leaves no doubt about early winter having arrived with it’s claws and icy teeth out. In my kitchen, at least when it comes to sweets, this simple fact translates into: the time for the heavyweights in the chocolate’y business has arrived~! Dark chocolate, “warm” spices like cinnamon and allspice, nuts, dried berries, maybe a little bit of liqueur, orange’y hints… that sort of comforting taste that makes you lean back and stick out your tongue at the cold and gray november ick outside, satisfied grin on your face.
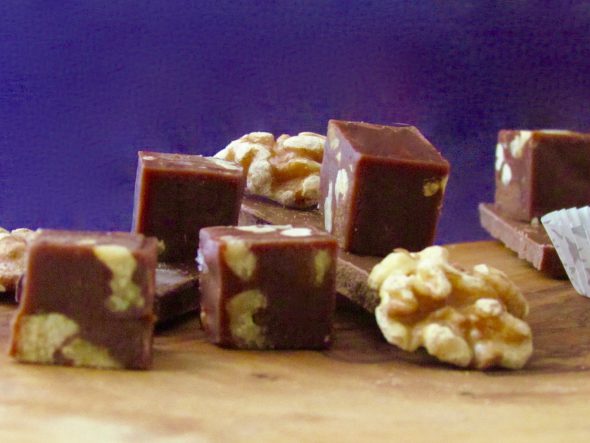
One of those intrinsically winter’y combinations, in my book at least, are walnuts and dark chocolate. When I was a kid, my grandma’s garden was home to a huge walnut tree, throwing off more than enough nuts around this time of the year to make the whole family and neighborhood… and their families, both grin and groan simultaneously at the prospect of collecting, shelling and eating them as well as getting rid of the seemingly endless heaps of leaves and husks the tree also threw off in the process. My task, as a small child amidst the hubbub of a large-scale walnut harvest, was, of course, to make the clean-up job for the grownups harder by relishing in the simple joy of jumping into the freshly stacked up piles of leaves right before sneaking the freshly shelled nuts when nobody was watching~! Good times… Anyways, remembering my grandma’s walnut cookies while ago, I decided to give the combination of dark chocolate and walnuts – which I really didn’t appreciate as a kid, dark chocolate being an aquired taste and all that – another go… with these little yummies!

The Walnut Fudge
150g Walnuts, toasted and roughly chopped
100g 75%-85% Dark Chocolate, roughly chopped
80g Milk Chocolate, roughly chopped – assuming you buy your chocolate in the standard 100g bars, finely grate the remaining 20g in order to dust the bites after cutting them.
Alt: 80g Mild Dark Chocolate with Caramel Splinters – if you want to give the fudge bites a little twist, this type of chocolate works beautifully! I also tried two different brands of orange scented chocolate to infuse the fudge with more “winter”, but one turned it bitter and the other one into soap. I strongly advise against scented chocolate in this one… If you want to add something orange’y, grate some orange-scented chocolate or some orange zest in addition to the 20g Milk Chocolate to dust the bites with at the end.
400ml Sweetened Condensed Milk
225g Fine Caster Sugar
40ml Liquid Glucose
60ml Honey
125g Butter
Fleur de Sel
1) Set a heavy-based pot on medium heat.
2) Add the sugar, glucose, honey and condensed milk to the pot. Give everything a good stir and bring the goop up to a gentle simmer.
3) This mixture, especially the not-yet-dissolved sugar, is an expert in the stick-and-burn department, so, grab a whisk or wooden spoon and keep stirring until you don’t get a grainy feel through it anymore – by that time the sugar will have dissolved and your batch of sugary sort-of-liquids will be out of the woods for the most part.
4) As soon as you don’t get the sugar feel through your spoon anymore, flake in the butter and keep stirring until that, too, has completely dissolved.
5) All that stirring action will have lowered the temperature of the mixture inside your pot, so give it a couple of minutes to get back up to speed. Once bubbles start rising again, leave the mixture to simmer for around 6-8 mins.
6) By that time the rising bubbles will start making a kind of… heavy and wet popping noise… You’ll know what I mean when your fudge reaches that point.
7) At that point, start stirring again and keep at it until the proto-fudge slowly turns the color of milk coffee or a light cappuchino.
Aside from the color change, here’s a couple of other indicators that will tell you when it’s done:
• As you stir, your spoon or whisk will start pulling the fudge mixture away from the sides of your pot in thick strands.
• Your whisk will also leave streaks on the surface of the mixture that will be visible for a moment before blending back into the crowd.
• Dip the back of a spoon into the fudge, give it a couple of seconds to cool off <insert my inevitable sermon of „Hot sugar! Danger!“ here>, then drag the tip of your finger through/across the dot of fudge – if the mark keeps it shape, you’re golden, if the fudge flows back in to close the gap, keep at it a little longer.

8) Turn the heat down to low once you’ve reached the desired consistency.
9) Now start adding the bits of chocolate in batches, stirring until each addition has dissolved completely. If you pick up a spoonful and let it drop back into the mix, it should come off your spoon in sheets at this point. The mixture will also get harder to stir now, if you take your time with the chocolate you might even start to work off some of the calories in advance… well, not really. Don’t go reading or adding up the calories on this one, believe me, you don’t want to know. Let’s leave it at that.
10) Fold in the walnuts, carefully and with a rubber spatula to avoid breaking them up into too-small bits.
11) Line a brownie tin with a sheet of baking parchment.
12) Pour the hot fudge into the tin, tap it onto your work surface to make trapped bubbles rise and pop out, then jiggle the tray a bit to even out the surface.
13) Leave it to settle down for around 10 mins.
14) Lightly and evenly sprinkle the surface with Fleur de Sel flakes. To make judging the amount you’ll need easier, try to imagine the size or shape you want to cut the fudge into and try to get a couple of salt flakes on each of those portions. Ball up a paper towel and gently press down on the surface to make the flakes stick to it.
15) Set the tin aside and leave the fudge to cool off to room temperature. The mixture, thanks to the sugar being a lot hotter than one might think, takes around 2-3 hours to get there.
16) Once it’s cooled down, cover the tin with clingfilm and pop it into the fridge to chill overnight – make sure there’s nothing particularly smelly inside! Both chocolate and sugar just love to take on surrounding aromas.
17) After the fudge had it’s rest, unwrap it and cut it into bite-sized pieces.
18) Lightly mix the finely grated chocolate and, if you’re using it, the orange zest in a small bowl and dip the freshly cut fudge bites into the mix before setting them into an airtight container, lined with a sheet of baking parchment.
19) Keep them in their container until 10-15 mins before serving them. That way they’ll stay fresh for around 2 weeks.
Enjoy~!
♥
