
 Skirting the outlines of our midwinter getaway to the north last week reminded me of the fact that, during my Goat’s Cheese Crème Brûlée & Spiced Quinces Post, I promised to share another one of the treats that have proven to be capable of pleasing or even converting the most militant Goat’s Cheese Grumps. Given that this one’s inspired by the Tyrian Chef’s Guild’s menu, you might wonder how I got from a stormy Northern Sea island without a stable internet connection to actually go on a gaming spree during one of those storms to a warm-and-fuzzy Tarte with magical properties like that?
Well… For quite some time before this particular trip, I had been experimenting with an idea of a savory goat’s cheese and pear, apple or quince combo in a pastry-kind context. Anything from hot pocket-style parcels wrapped in filo pastry to a bastardized pan-baked pizza version – you name it, I’ve probably made it – yet none of those turned out quite as I wanted them to be. There was nothing off in the taste-department, mind you, I had the flavors balanced out after one or two rounds of trial-and-error. The problem was simple: Pale dough. Pale cheese. Pale fruit. No oven and no inclinations whatsoever to deep-fry anything just to make it look good. Actually, I did the puff-pastry-tile thing once after hijacking an unsuspecting oven, but the improvements in the pale-on-pale scheme of things was… insignificant at best. So, for a long time, I was sitting on a delicious recipe I couldn’t share with you guys, simply because I couldn’t make the result look tasty! Until this little Tyrian dessert…
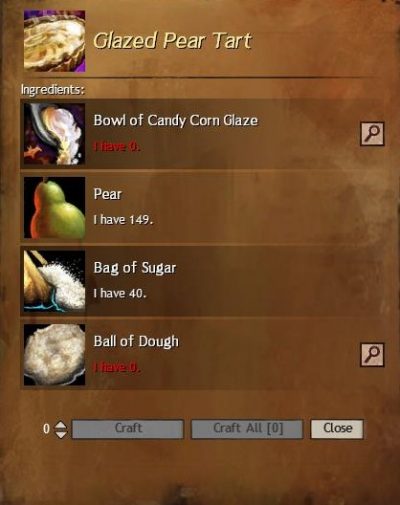
…caught my eye and gave me an idea~!
Why not take a savory twist on a classic for a walk down the classic road~? I suppose it’s the obvious thing to do if you’re used to having an oven at your disposal whenever a cake-baking whim tickles you, but for me… not so much! Anyways, during this year’s trip up north, I used one of the aforementioned dark and stormy days best spent beneath the warm and comfy reed cap of our little house to finish my series of experiments on the whole shebang and paint smiles on the faces of Hubby and my parents with this “Something between a cheese course and a dessert and better than either or both. Are there seconds?” kind-of tarte.
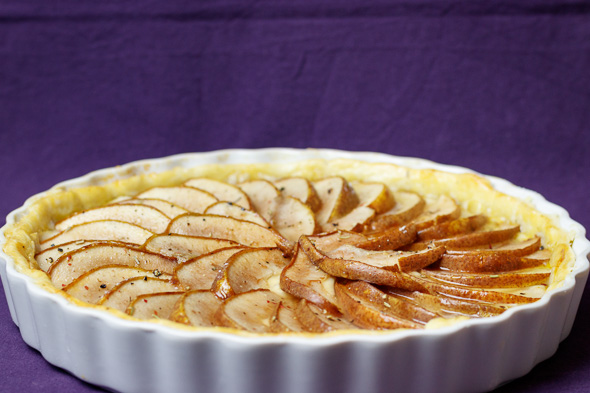
The Glazed Pear and Goat’s Cheese Tarte
Before we begin… don’t be put off by this seemingly long list of ingredients~! I simply separated the list into “component” sections because a number of them are used in more than one part of the dish. This is actually quite an easy-breezy dish to whip up – the one thing taking up the largest portion of prep-time is actually the resting period for the dough, which is best taken care of the day before the gig~! Or, depending on your knife/peeler-skills, the pears…
The Dough
200g (Wholegrain) Wheat Flour
55g Self-Raising Flour
50g Fine Caster Sugar
1 Tsp Dry Yeast
½ Unwaxed Lemon, Zest
2 Medium-Sized Eggs
60ml Warm Water
½ Tsp Fine Sea Salt
1 Tsp Fresh Rosemary, finely chopped
75g Butter – take it our of the fridge 30 mins early to allow it to soften up a bit
Neutral Vegetable Oil for the Form/Tin
Cheaty Alt#1: 400g High-Quality Ready-made Butter Puff Pastry – fit it to your tin, prick it with a fork, top it off with a layer of baking paper and blind-bake it for 5-10 mins before adding the filling, that way the base of your tarte won’t turn soggy~
Cheaty Alt#2: 400g High-Quality Ready-made Wholegrain Pizza Dough – you can even skip the blind-baking business with this one~
Like I said, best take care of the dough the evening before the tarte is supposed to make an appearance on your dinner table, so get the show on the road by…
1) Sieving the flour, sugar and yeast into a large mixing bowl.
2) Stir in the water and crack in the eggs.
3) Knead for the lot for about 5 minutes, then add the soft butter, rosemary and salt.
4) Once it looses the eggy-wetness, turn the dough out on a lightly floured work surface and continue to work it for another 5-7 minutes until it’s smooth, soft and slightly springy to the touch.
5) Wipe any remaining flour crumbs out of the mixing bowl and rub it with a little bit of vegetable oil.
6) Roll the dough up into a ball and place it in the bowl before covering it up with a layer of clingfilm.
7) Place the bowl in the fridge and allow it to rest for 12-24 hours.
The “Filling”
200-250g Mild Soft Goat’s Cheese – my pick: a ripe and mellow Goat’s Milk Camembert
50-75g Firm Goats Cheese, grated or finely chopped – keep a few strands for the top~
50g Icing Sugar
1 Tbsp Orange Zest
1 Tbsp Fresh Thyme Leaves
2 Medium-Sized Eggs, lightly beaten
100g Ground Almonds, lightly toasted
600g Ripe Pears (about 2-3 large ones), cored and thinly sliced – pat the slices dry with paper towels just before arranging them on the cheese mixture.
1 Tbsp Honey
A very generous Pinch each of Salt and freshly cracked Pepper
The Glaze
30g Icing Sugar
3 Tbsp Orange Juice
1 heaped Tsp Orange Zest
1 Tbsp fresh Rosemary, very finely chopped
½ Tbsp Extra Virgin Olive Oil
The Dot on the I
30g Almond Slivers, lightly toasted
1 Tsp Lemon Thyme Leaves
A generous Crack of Pepper
1) Preheat your oven to 170°C.
2) Pop all of the ingredients for the glaze into a mixing bowl and whisk the lot until the sugar has dissolved completely. Set the bowl aside for a couple of blinks.
3) Pick up your goat’s camembert and remove the rind before flaking it into a mixing bowl or food processor along with the honey, orange zest, thyme, 1 ½ of the eggs and the ground almonds.
4) Whip or whizz the lot until the mixture turns smooth and creamy – or as “creamy” as the almonds allow~
5) Fold in the freshly grated firm cheese strands – or decide to top off the pear slices with them instead for a kind-of-pizza visual later on.
6) Set the bowl aside for the time being.
7) Pick a tarte form and lightly gloss the inside as well as the rims with a bit of vegetable oil.
8) Retrieve your dough and roll it out into a 5mm-thick blanket roughly the size and shape of your tarte tin. Guesstimate a 1 ½ cm-wide rim in addition to the diameter (plus the height of the rim~!) of the form just to be on the safe side.
9) Carefully pull the blanket over the form and use a spare ball of dough to gently press and fit the dough into the shape and curves of the form in front of you.
10) Trim off any bits of dough hanging over the edges of the tin at this point and smooth down the cutting edges with your fingertips to keep them from burning up later.
11) Grab the cheesy mixture and evenly spread it out on the base of your future tart.
12) Fan out the pear slices on top of the cheese mixture, making sure they’re arranged along the edges of the form, overlapping each other a bit in order to create a (mostly) closed layer.
13) As you go, gently press the pear blanket down into the cheese mix just a little – just the “closed layer” bit, this mini-step counts towards the goal of minimizing the dangers of air pockets in the cheese layer filling up with either hot air or hot pear juice, neither of which yield desirable results.
14) Once you’re done with the cosmetic touch-ups on the pear layer, generously brush the rims with the remaining beaten egg.
15) Tightly cover the tarte with a sheet of aluminum foil, tuck it away in a warm spot of your kitchen and allow it to R&R for 15 mins.
16) Place the tarte on the middle rack of your preheated oven and take off the aluminum foil.
17) Allow the oven to work its magic for 20-30 mins until the pears are deliciously tender, golden and caramelized and the crust had enough time to turn a crispy golden-brown as well.
18) Place the tin on a cooling rack, grab your glaze and evenly distribute in on top of the pears before giving the delicious treat about 15-20 mins to cool down and set properly.
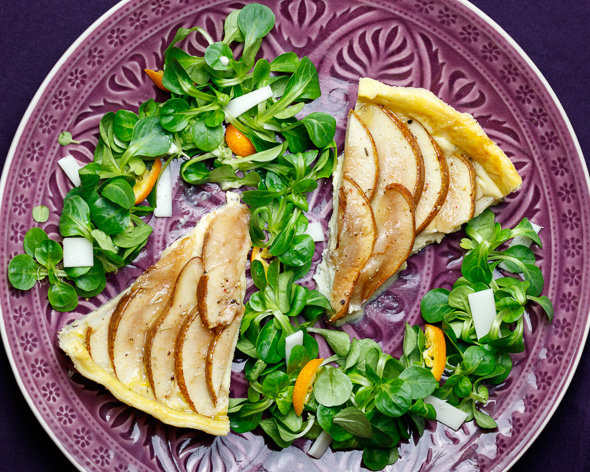
19) Sprinkle the top with the lemon thyme leaves and toasted almond slivers just before serving.
Enjoy~!
“♥

This tart looks amazing! Goat cheese with fruits is such a great combination.
LikeLiked by 1 person
Thank you so much~! As you know, I absolutely love Goat’s Cheese, especially combined with fruit~ Enough so, in fact that, every time I’m over the moon about a new dish along these lines and about to publish the recipe for it, I’m afraid I might overdo it and end up boring you guys with yet another Goat’s Cheese recipe, so I’m reeeeeally happy to hear you enjoy it 😀
LikeLiked by 1 person
It’s always great to see new ways of using this tasty combination. 🙂
LikeLiked by 1 person
Pingback: GW2 Glazed Peach & Taleggio Tarte – Nahdala's Kitchen